
User profiles and guest mode offer individual access to i3CONNECT displays, supporting two-factor authentication that is managed in a centralized way. From Cortex, you can enable both modes and define their behavior to find a way of working that best matches your use case.
You can find it under settings → Admin Settings → Access Management → User Profiles & Guest
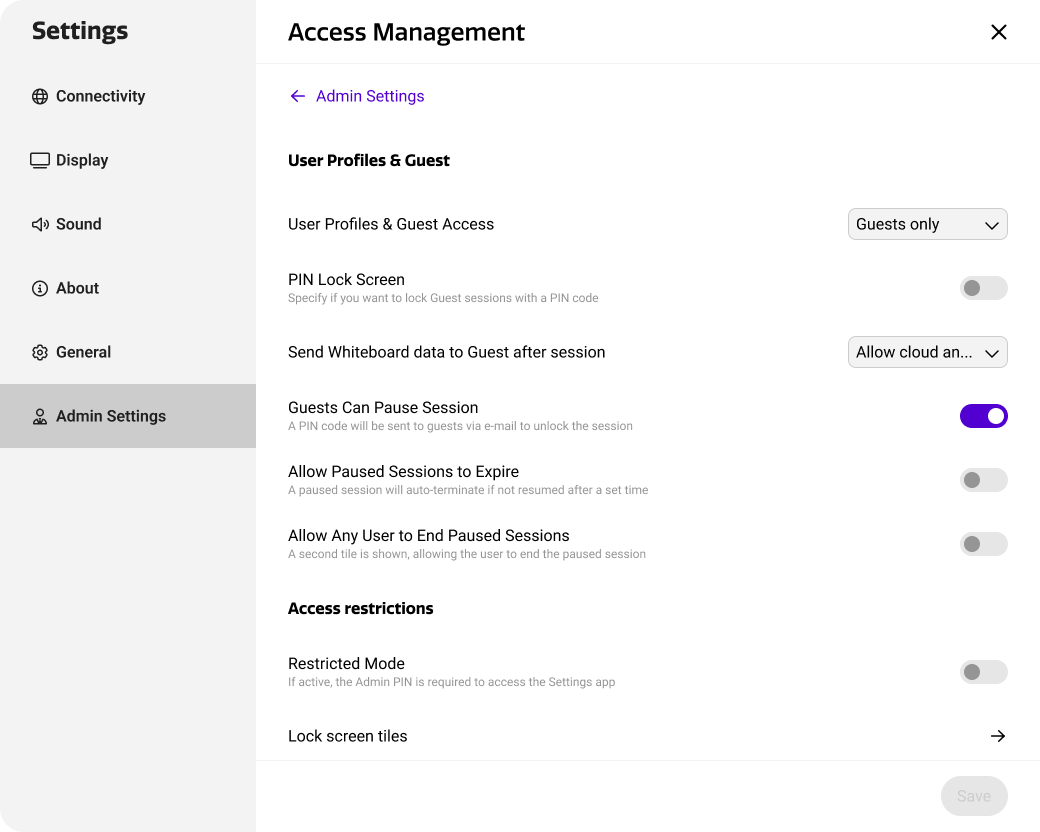
User Profiles and Guest Settings
User profiles and guest offers three modes of operation, as described below.
|
Mode |
Result |
|---|---|
|
Disabled |
The display is freely accessible, unless a device-specific PIN was set. |
|
User Profiles |
This enabled user profiles and guest mode, requiring users to login with multi-factor authentication. |
|
Guest Only |
This enables the guest mode only, requiring users to login with multi-factor authentication. |
Enable / disable
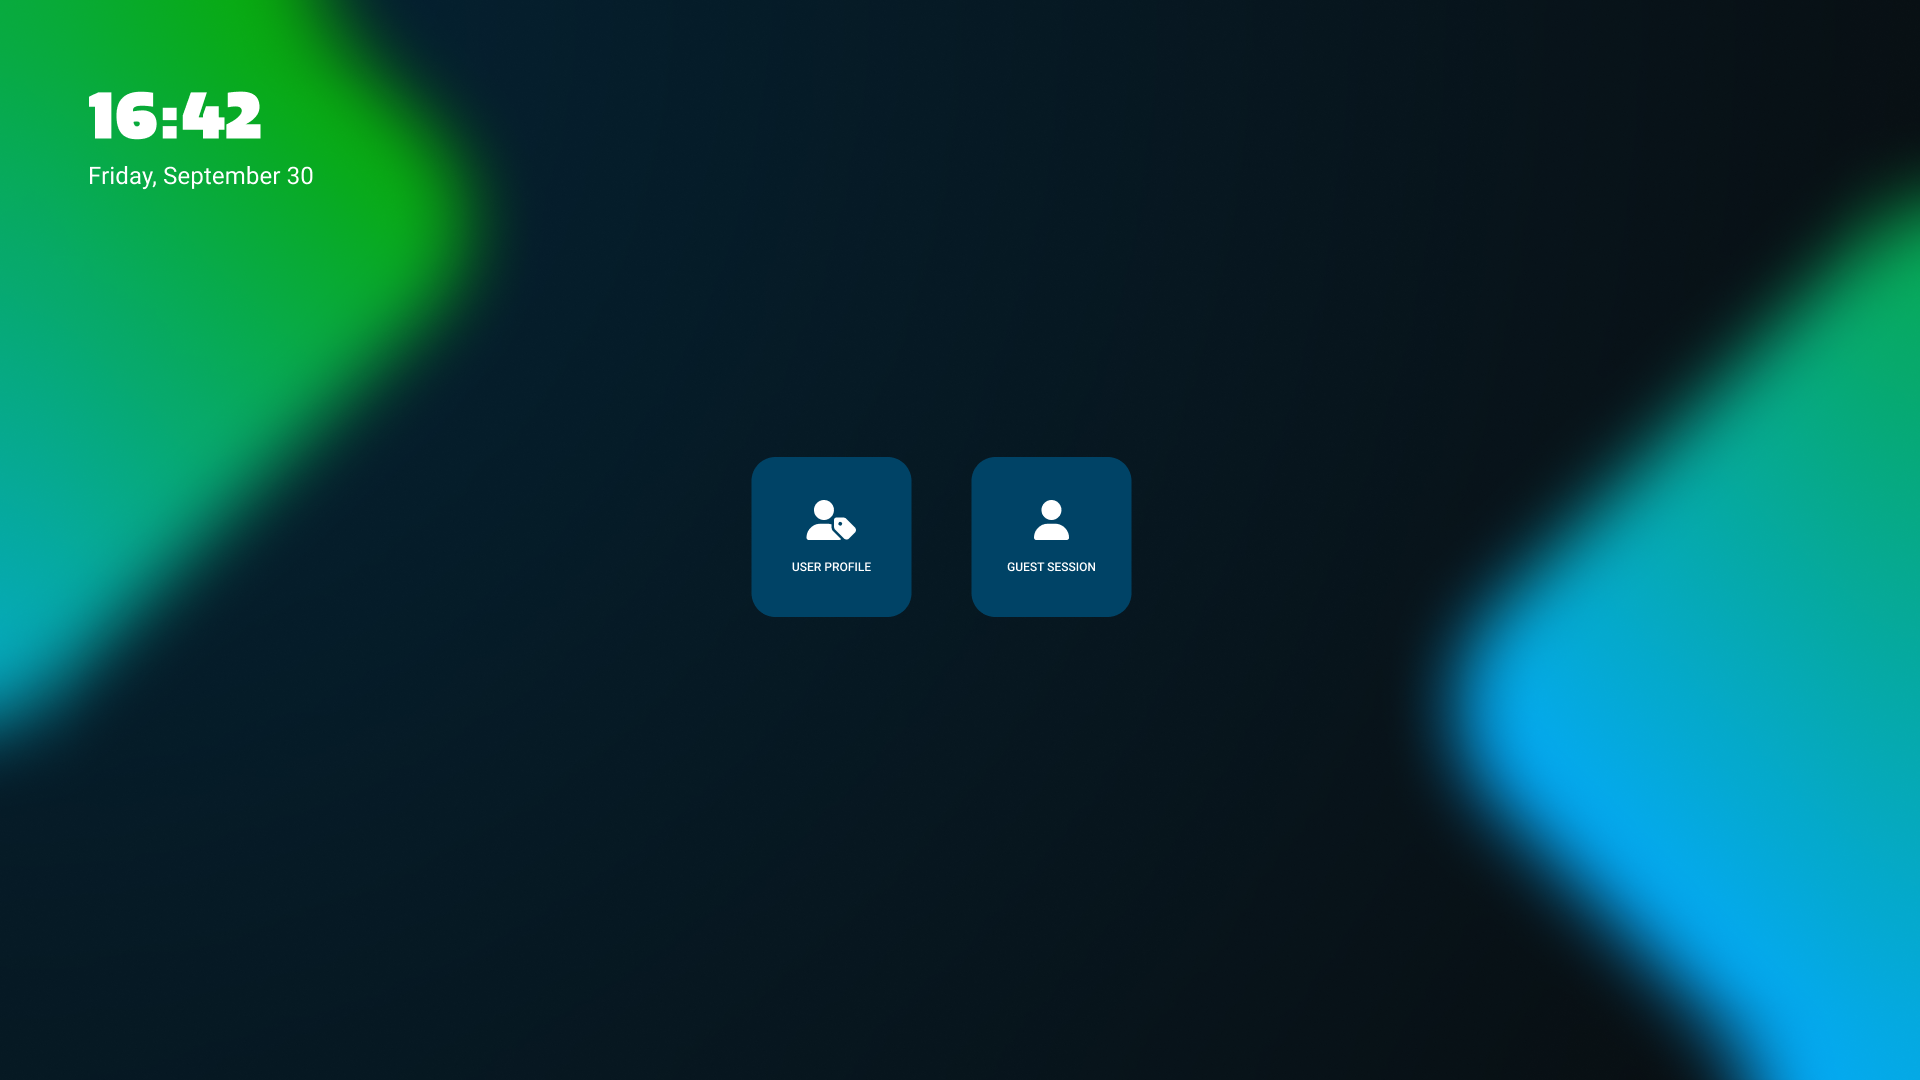
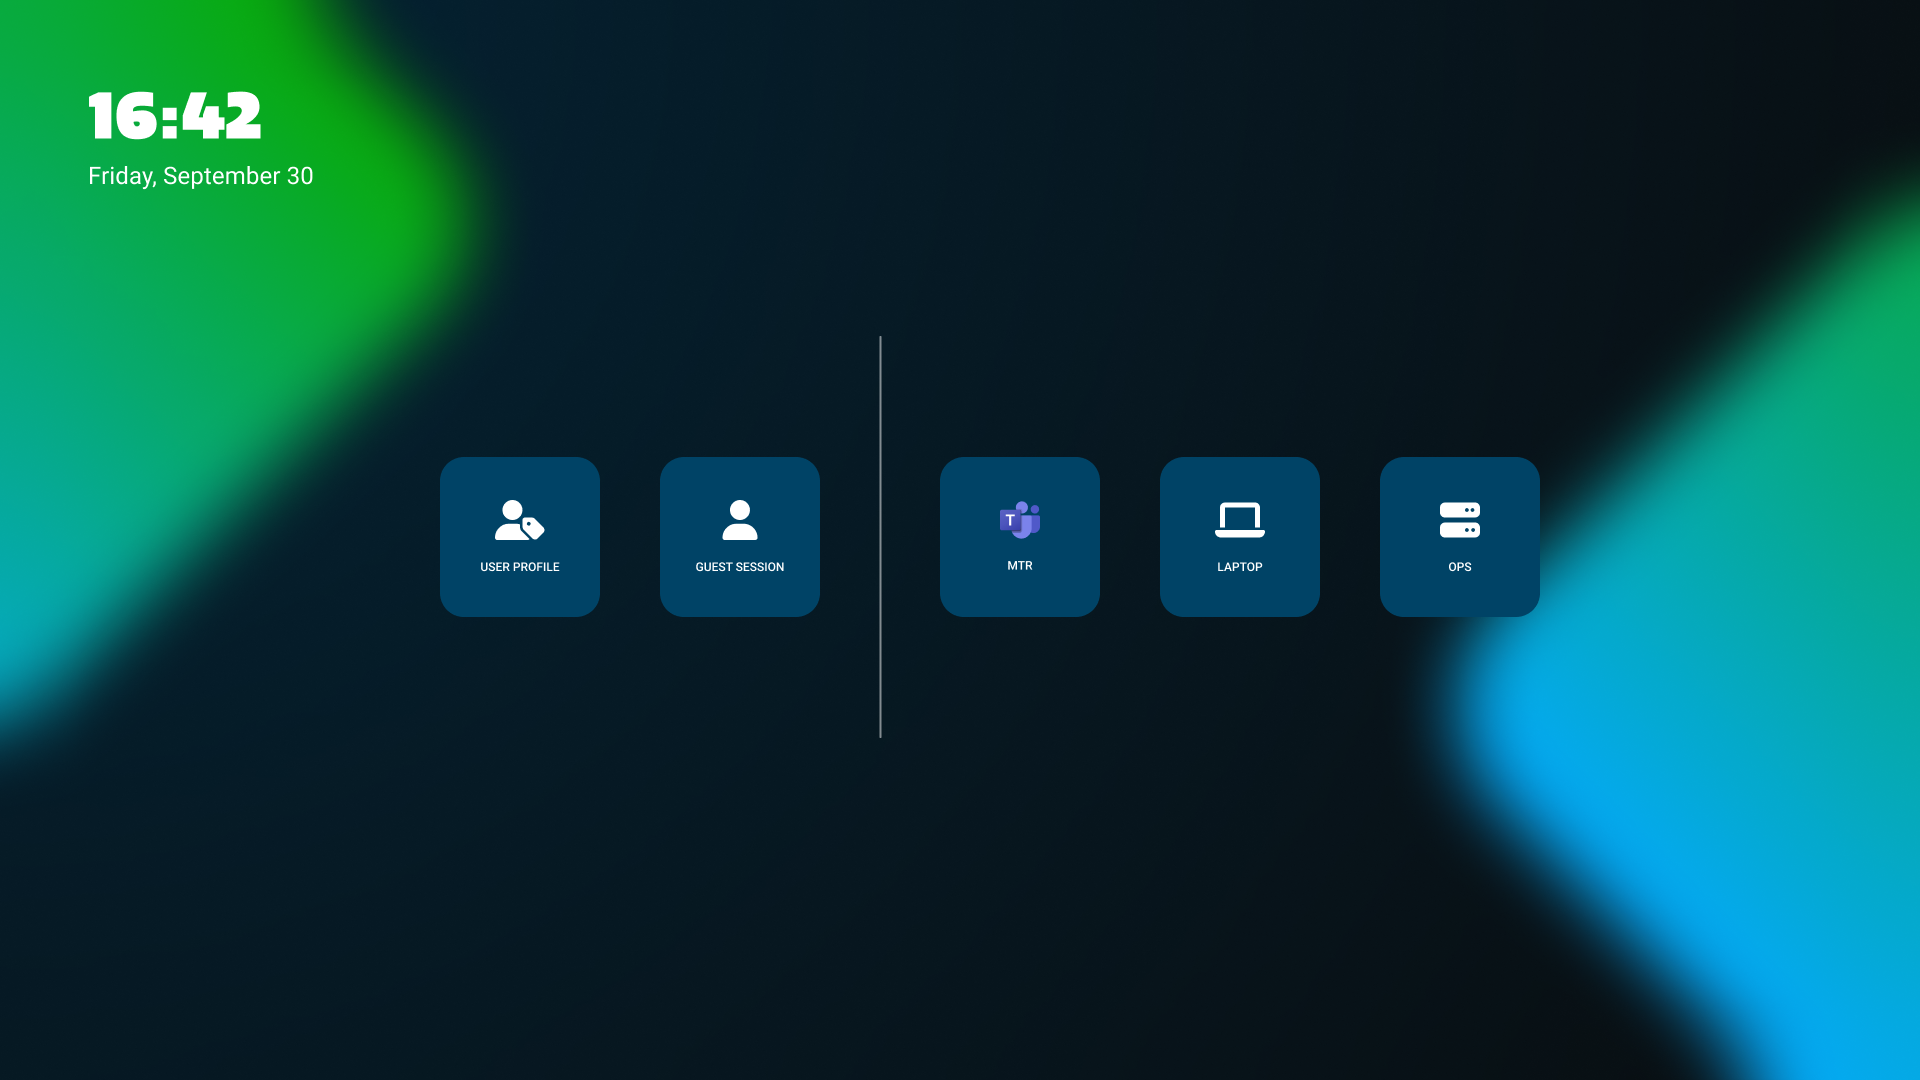
When user profiles or guest only is activated, the display is no longer publicly accessible and requires authentication. This means that between sessions, the display will revert back to the login page below. When starting a session, the system will guide the user through the login process. A full description of this can be found in the Studio manual here: [ARTICLE].
Guest data export
For guest sessions, Studio can automatically export the whiteboard data to the registered guest user. This way, notes are securely exported before the system wipes all guest data, ensuring that valuable notes and other whiteboard content is shared with the guest user.
To enable this, however, a guest must use a form of authentication to provide their email address. The authentication method can be configured from Cortex, using the ‘Send Whiteboard Data to Guest after Session’ setting, described in the table below.
|
Whiteboard Setting |
Result |
|---|---|
|
Don’t Send |
Guest users cannot authenticate when starting the session. Whiteboard data must be exported manually from the app. |
|
Allow Email Authentication |
Guest users can authenticate using their email address when starting the session. When this is used, whiteboard data is automatically sent to that email address after the session. |
|
Allow Cloud Authentication |
Guest users can authenticate using their Microsoft or Google account when starting the session. This works over QR code. When this is used, whiteboard data is automatically sent to the associated email address after the session. |
|
Allow Cloud and Email Authentication |
Guests can choose between the email and cloud methods above. |
Guests can always choose to skip authentication. In this case, the automatic whiteboard export does not apply.
Guest PIN lock
As guests can skip authentication, the display is still accessible to anyone with physical access. As all guest data is removed after the session, this is comes with little risk.
In situations where access is critical, the guest mode can be protected with a general PIN code. You can configure a PIN between 4 and 8 characters.
The PIN will be required before starting a guest session, providing optimal security over your device.
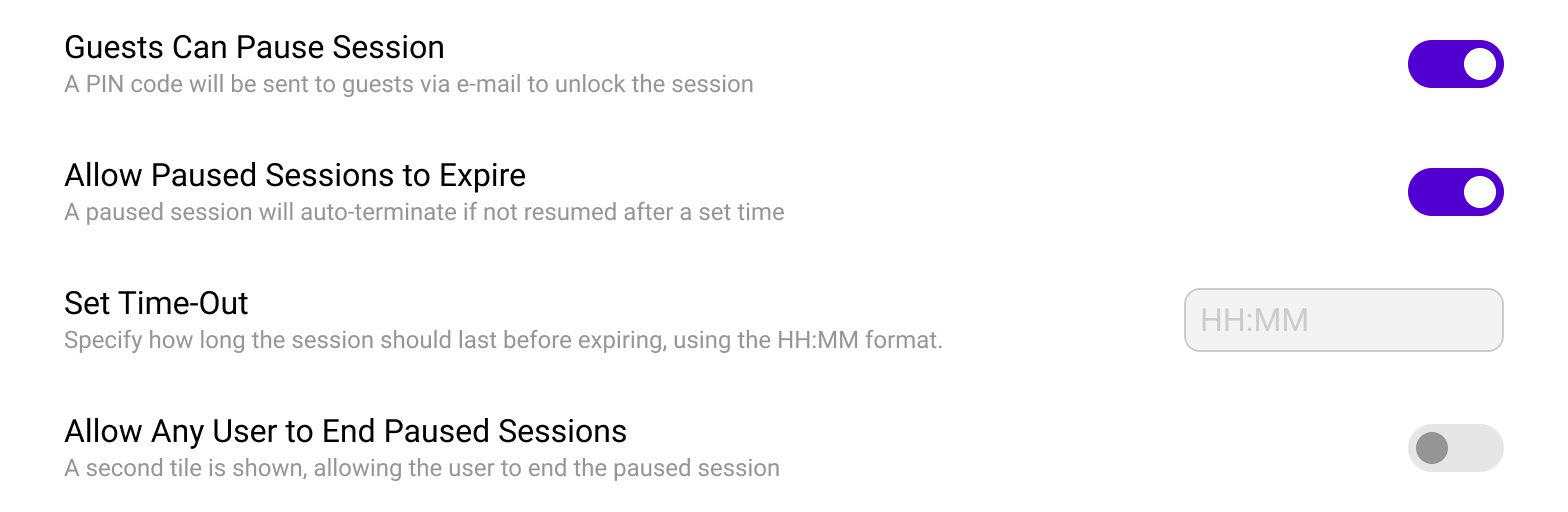
Pausing guest sessions
Guest sessions are designed to have a temporary nature. Once the session is ended, all user data will be removed and the display reverts back to a ‘clean sheet’. This behavior is desirable, to prevent other users from accessing your notes, downloads, browsing history, or any other data after you leave the room.
It is possible, however, that guest sessions extend over a longer period of time. Brainstorming sessions, or day-long presentations may be interrupted by lunch, coffee, or anything else. In this case, you do not want to end a session, as it removes your data, but you also don’t want to leave the display open, as it may contain private content.
This is why guest sessions can be paused. Using pause, a guest session is temporarily locked to prevent unwanted access until you return. This behavior can be adjusted with several settings, as described below.
|
Setting |
Result |
|---|---|
|
Guests can Pause Session |
Instead of ending, guests can also pause a session. This will lock the display with a PIN, which is sent to the email that was provided during the guest’s authentication. |
|
Allow Paused Sessions to Expire |
In case guests do not return, session can be set to automatically expire. After a configurable time (HH:MM), the session will end and the whiteboard data is automatically exported to the email that was provided during the guest’s authentication. |
|
Allow Any User to End Paused Sessions |
While a guest session is paused, the display cannot be accessed by anyone else. With this setting, anyone can end a paused session which will automatically export the whiteboard data to the email that was provided during the guest’s authentication. |
Lock screen tiles
For users that only want to use the display with an external source, it can be cumbersome to login and authenticate. Therefore, it is possible to configure tiles to external sources on the lock screen from Cortex, allowing users to instantly switch to an external source.
You can find it under settings → Admin Settings → Access Management → Access Restrictions → Lock Screen Tiles.
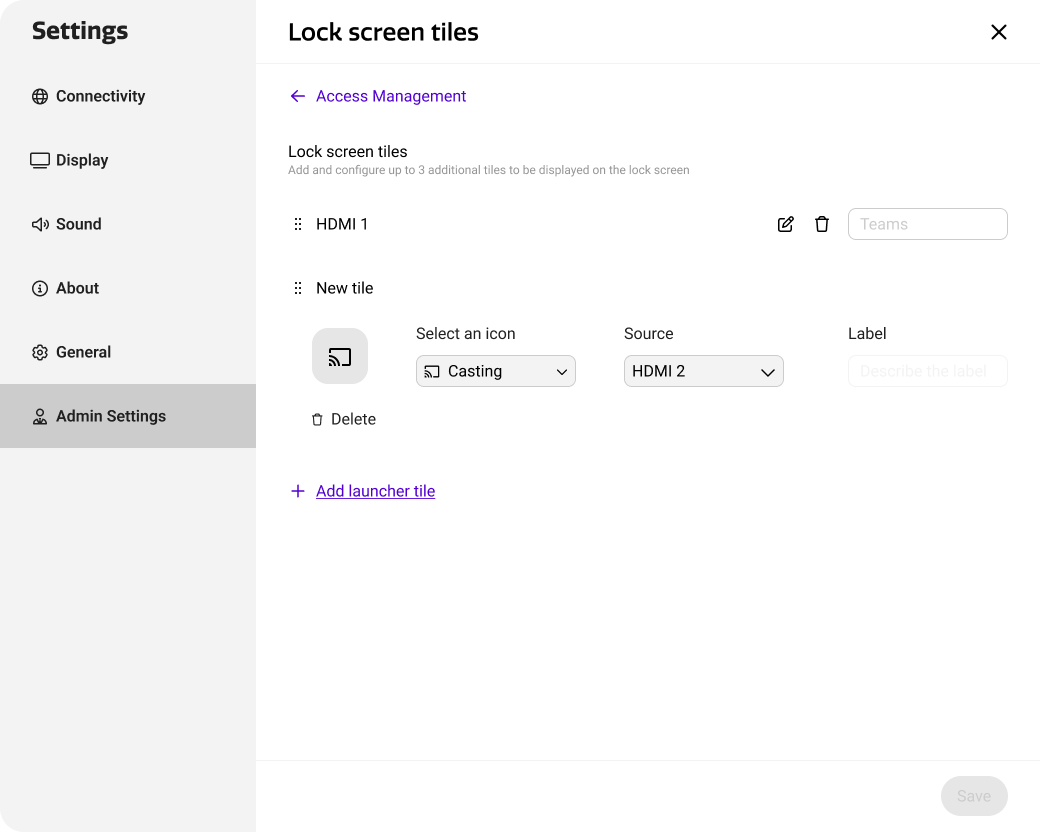
Configuring lock screen tiles works the same as configuring home screen tiles. In addition to a label, you can select a custom icon for lock screen tiles too, allowing users to more easily identify the right tile. Below is an example of a lock screen with additional lock screen tiles.
Creating user profiles
Whereas anyone can use the display in guest mode, user profiles need to be specifically created and assigned to displays to allow users to login. This way, you can for example limit display use to users from your organization, preventing that user data from external guests is stored on the displays.
You can create user profiles from the ‘Display Users’ page in Cortex. This page shows a list of all user profiles in your organization, as well as the displays and display groups that they have access to.

When creating a new user profile, you can specify the user details and configure which displays the new user has access to. When you activate the profile through this dialog, the user will receive an invitation email with a link to activate their account.

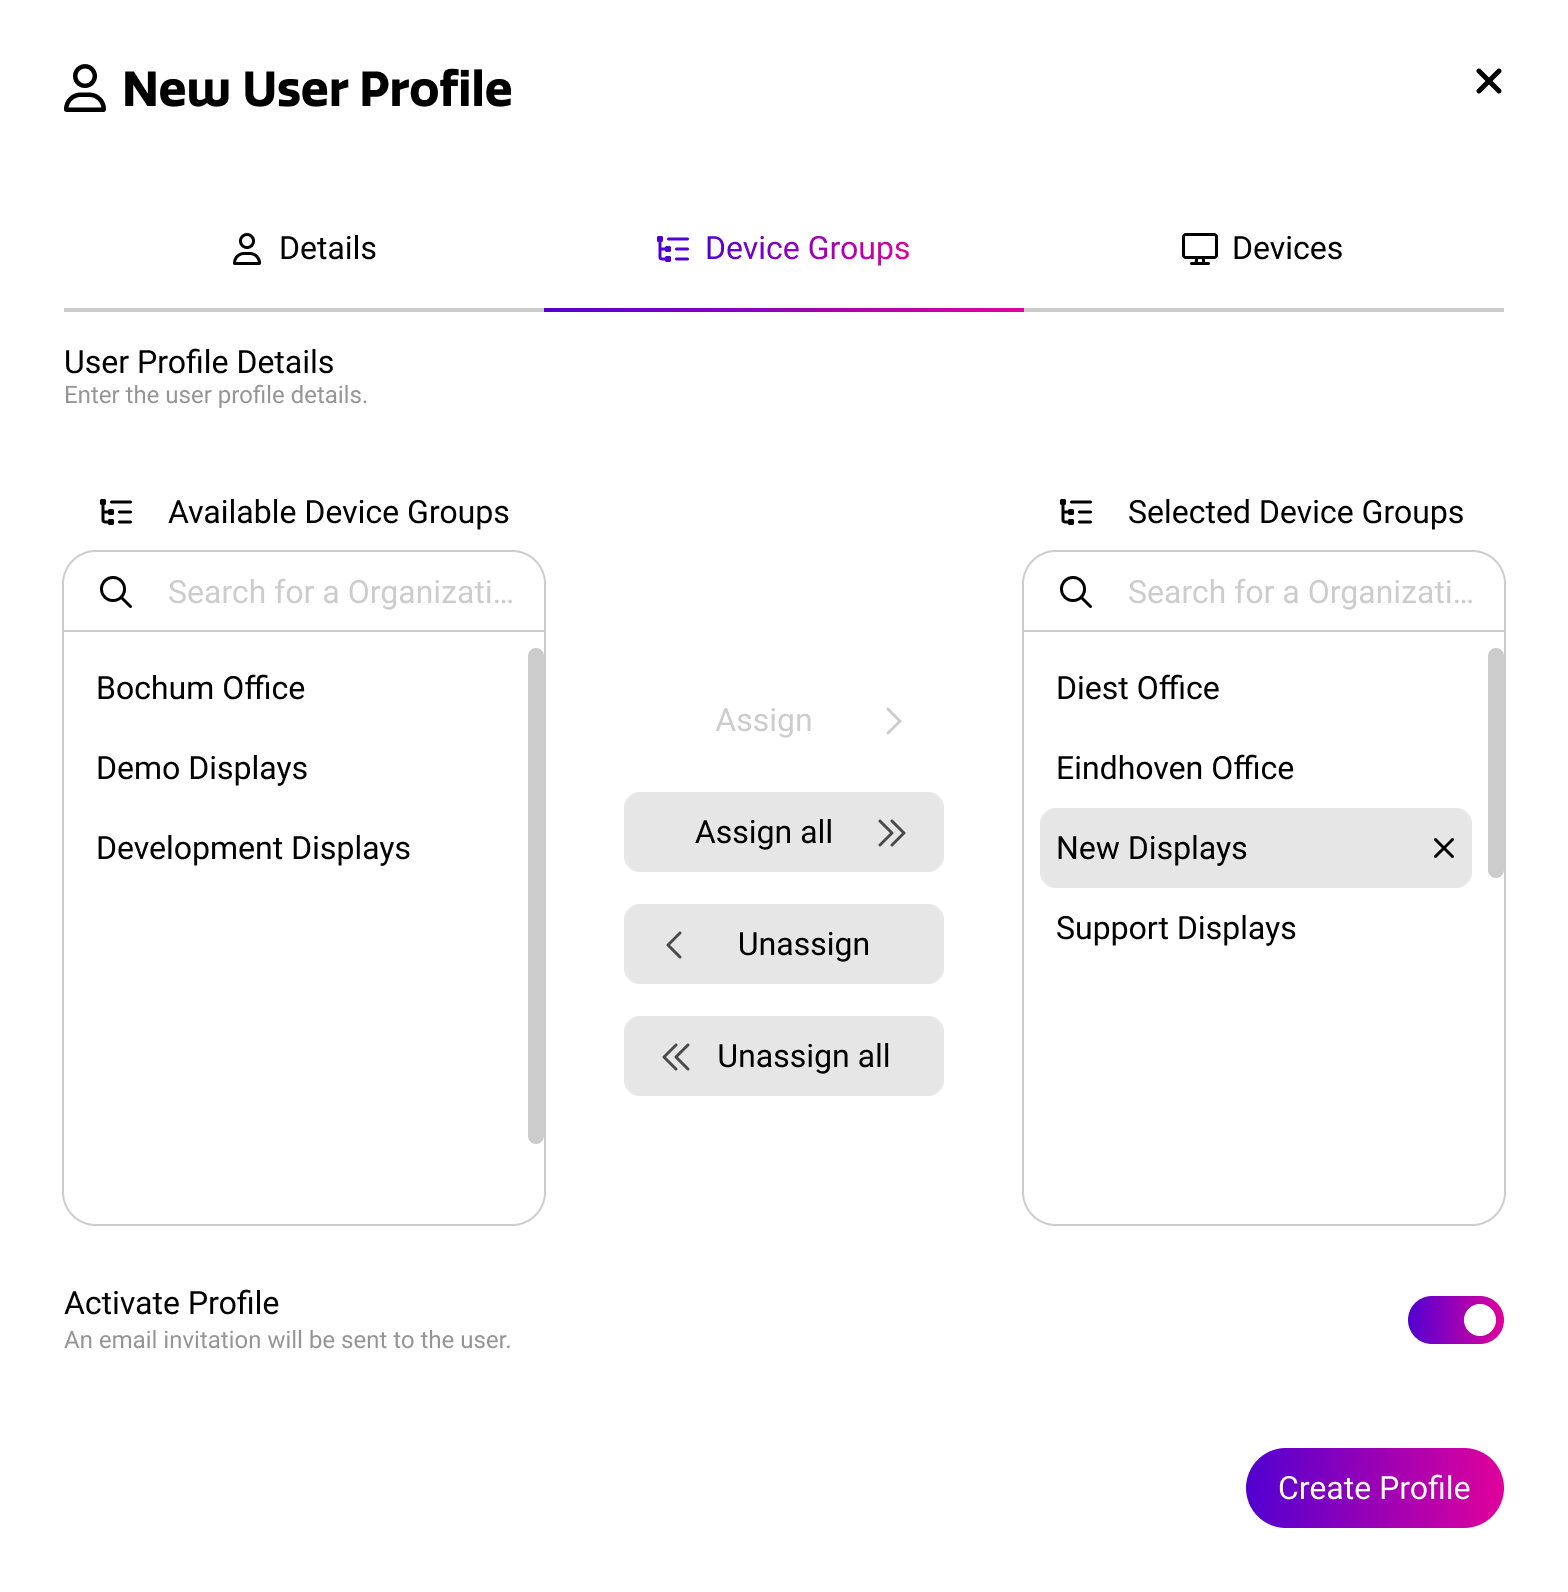
Users can also be uploaded in bulk using the import feature. The import dialog will provide you with an Excel / CSV template that you can use to register multiple user profiles at the same time.
When users activate their user profile through the invitation email, we recommend to use an account provider like Microsoft or Google to complete the profile setup. User that complete setup with an email/password combination will not be able to authenticate on the display using an external account provider.