
📘 Instructions
-
Download the touch test tool according to your display size, more information is at the bottom of the page
-
Open the program WDT8652_Ptool_2010 which can be found in WIN8 folder

-
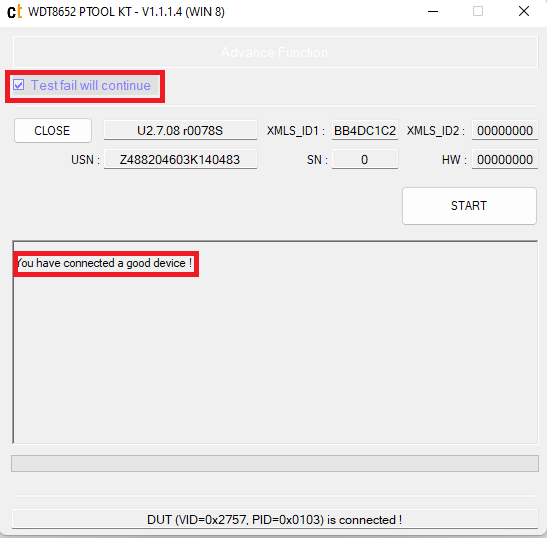
Connect your computer to the display with the HDMI and a USB A to B cable for touch registration.
-
Please check when you get the message that the device is connected and check the box “test fail will continue” and press “START”
-
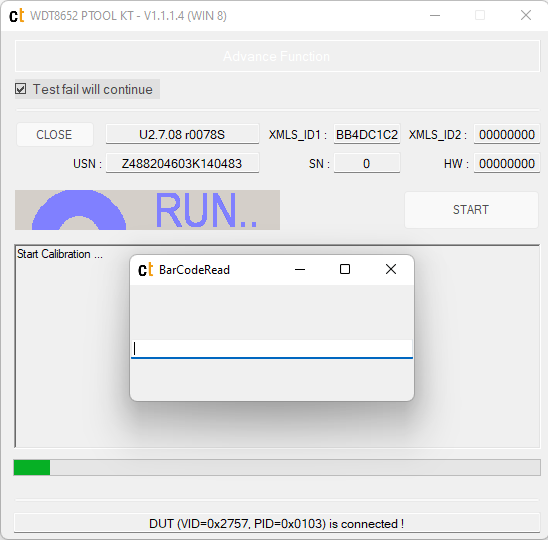
Enter the serial number of the display
-
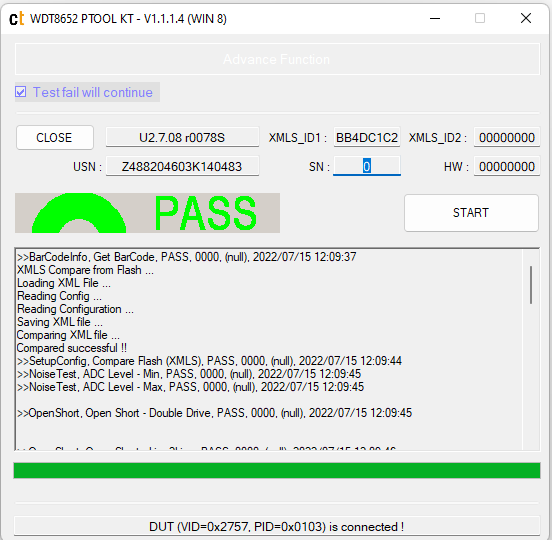
After this test, you may have 2 results
Pass
Not Pass
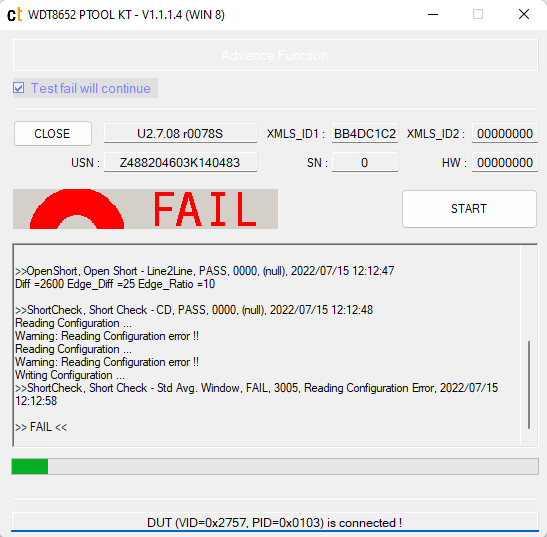
If the test has failed, please take a picture and save the text in a .txt file with the serial number as file name and send it to your service point.
Do not interrupt the touch test process in any way:
-
Do not touch the i3TOUCH display (due to potential touch recalibration)
-
Do not disconnect the i3TOUCH from power.
-
Do not pull out the cables
Choose the correct size of your display. Find out by reading the serial number. For example, i3TPX75XXXXXXX is 75 inches.
Ask your i3agent which one fits your device.
In case the touch firmware is not up to date, on this website you will find how to upgrade it
https://i3group.atlassian.net/servicedesk/customer/kb/view/926318679