
Need to update the BIOS on your i3CONNECT OPS? This guide walks you through the process using UEFI and a USB stick. These steps are for IT admins or technical users comfortable with BIOS and firmware updates. If your OPS is under warranty or you’re unsure, contact i3CONNECT support before proceeding.
By the end, your OPS should have the latest BIOS version installed and boot normally. If the update fails or your OPS won’t start, reach out to support.
This article is not for updating Windows or Android firmware, only the BIOS on the OPS.
Before you start
-
You’ll need a PC or laptop to prepare the USB stick.
-
Use a USB stick with at least 4GB, formatted as FAT32.
-
Download the correct BIOS update zip file for your OPS model.
-
A USB keyboard is required to access BIOS menus.
Instructions
-
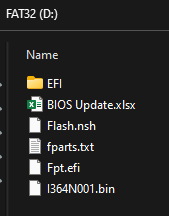
Extract the BIOS update zip file to your Windows desktop.
-
Format your USB stick to FAT32 (minimum 4GB).
-
Copy all extracted files to the root of the USB stick.
-
Insert the USB stick into the OPS and power it on.
-
Press the DEL key on your keyboard to enter BIOS.
-
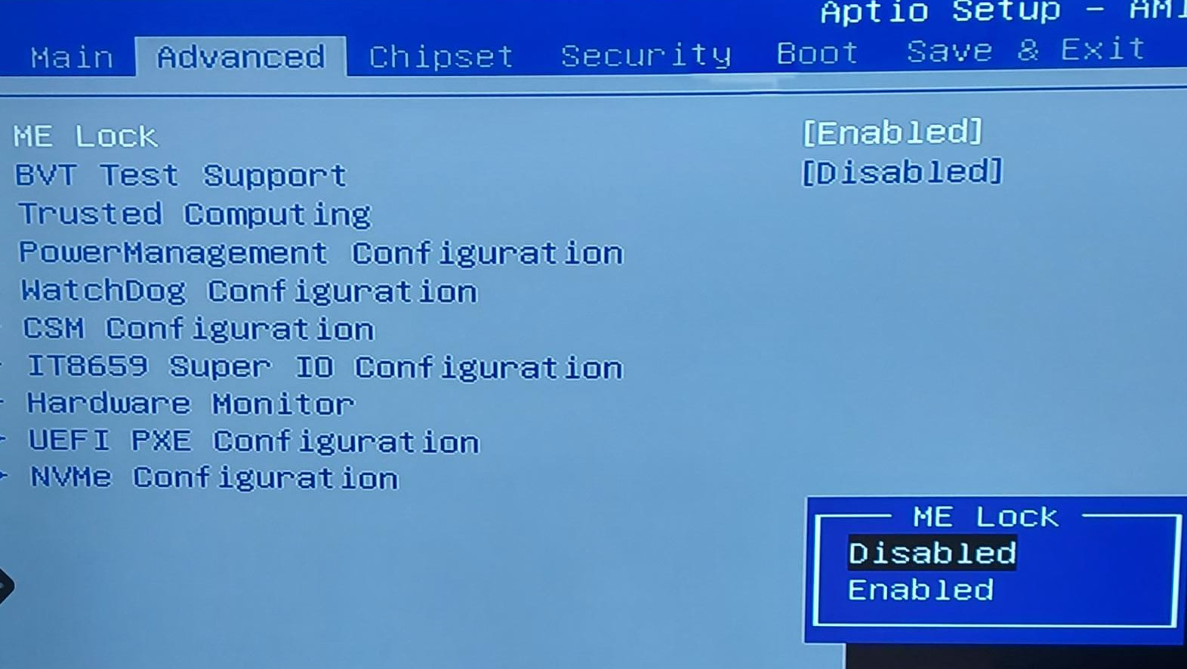
Go to Advanced > ME Lock:
-
For OPS 510: Set to Disabled.
-
For OPS 710: Set to Enabled.
-
Save & Exit, then restart the OPS.
-
-
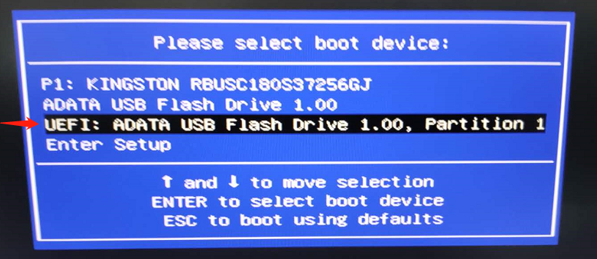
Press F11 during boot to open the BIOS boot menu. Select the UEFI USB stick.
-
Access the USB stick in UEFI shell:
-
Type
fs0:and press Enter. -
Type
dirto list files. If you don’t see your files, tryfs1:anddiragain until you find them.
-
-
Run the BIOS update script:
-
Type
FLASH.NSHand press Enter. -
Wait for the process to finish. Look for “FPT Operation Successful” in green text.
-
-
Power off the OPS and unplug it for at least 10 seconds before restarting.
Troubleshooting
-
If you can’t see files on the USB stick, try different
fsX:commands (e.g.,fs1:,fs2:). -
If the update fails or you see errors, do not power off immediately—note any error messages and contact support.
-
If the OPS won’t boot after updating, unplug for 30 seconds and try again. Still stuck? Contact i3CONNECT support.