
If you can’t access the debug menu on your i3TOUCH X2 and need to update the system firmware (systemFW), this guide walks you through the process using only the power button; no remote required. This article is for IT administrators or technical installers who need to recover or update an i3TOUCH X2 display. If your display is working normally or you can access the debug menu, use the standard update method instead.
By the end of these steps, your i3TOUCH X2 should have the latest system firmware installed and display the correct model type. If the display does not reboot or shows errors, see the troubleshooting section below.
If you experience issues during the update (such as no image or the process not completing), do not power off the device. See troubleshooting for next steps or contact i3CONNECT support.
Before you start
-
Disconnect all third-party devices from the display.
-
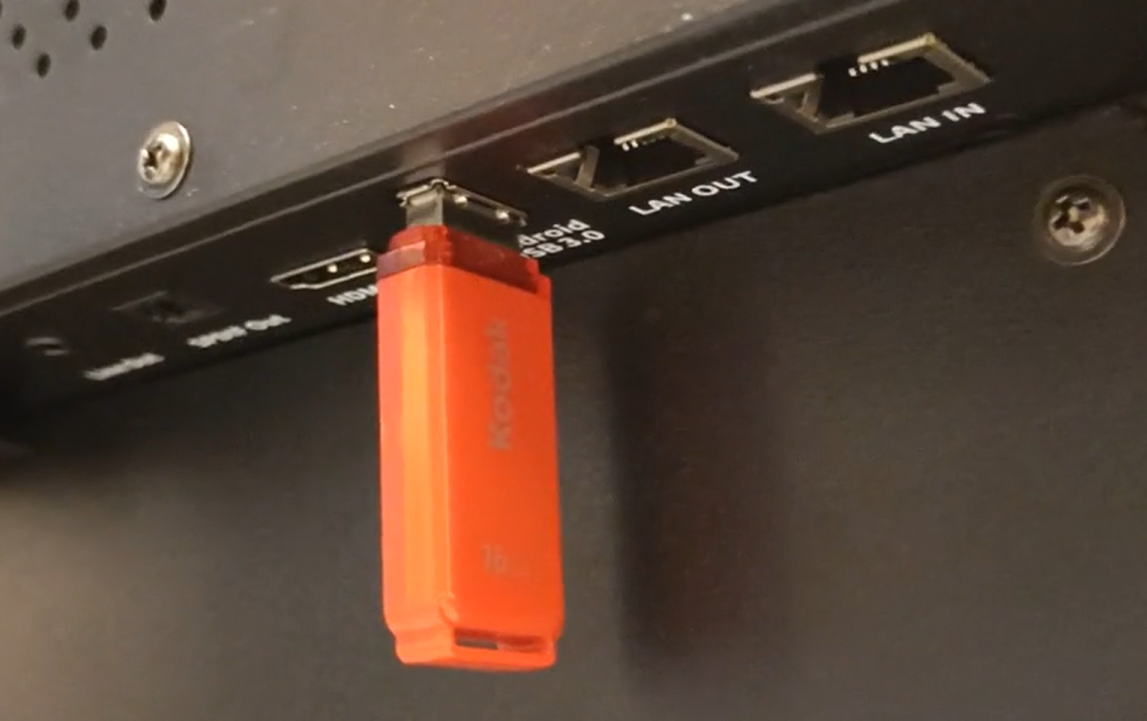
Ensure you have access to the rear Android USB port and the power switch.
-
Use a USB 2.0 drive, formatted to FAT32.
-
Download the correct firmware (.IMG file) for your i3TOUCH X2 model and version from the downloads below.
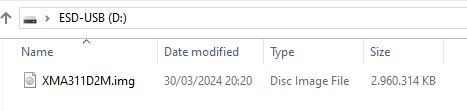
Make sure all 3rd party devices are disconnected, and that only the firmware file should be on the USB drive (remove all other files and folders) before you continue.
Downloads
Video Instructions
Instructions
-
Switch off the i3TOUCH X2 completely.
-
Insert the USB drive into the rear Android USB port (bottom-left corner when facing the display).
-
Press and hold the power button on the display. While holding, flip the power switch ON at the back.
-
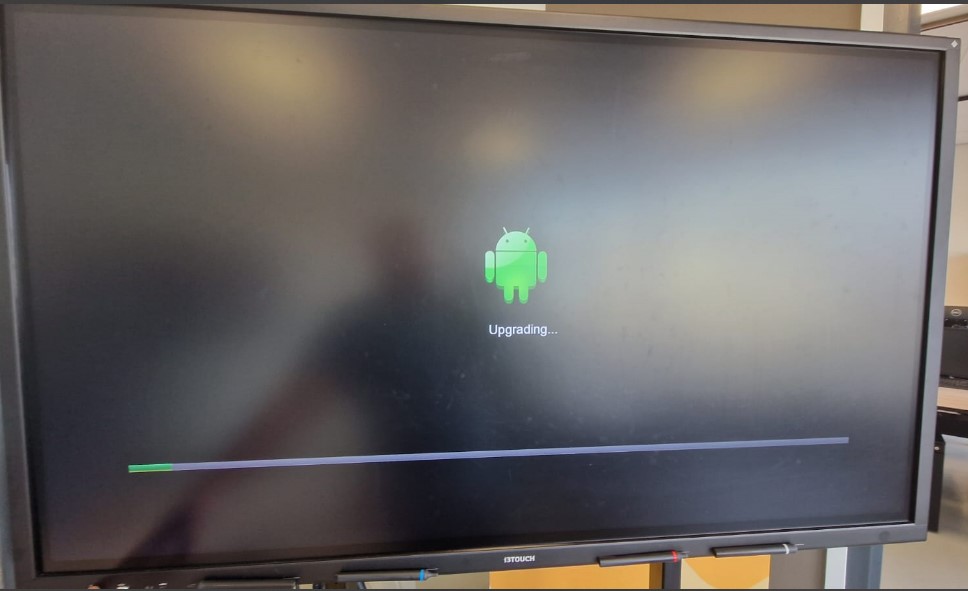
Wait for the upgrade process to start.
-
Keep holding the power button until you see the Android robot and a progress bar.
-
If there’s no image, watch for the status LED blinking slowly—this means the update is in progress.
-
-
Release the power button only after the progress bar appears or the LED blinks.
-
Wait for the display to reboot.
-
The first boot may take longer than usual (up to 10 minutes).
-
The device may reboot twice—this is normal.
-
After the manual installation, the display is always recognised as an X2-65, but here we will explain how to change the Model type to the correct model type.
-
Download the correct display size from these files:
|
Display size |
Download |
Notes |
|---|---|---|
|
X2 65” |
|
|
|
X2 75” |
|
|
|
X2 86” |
|
|
|
X2 98” |
(only use when you see a doubled image with separation in the center) 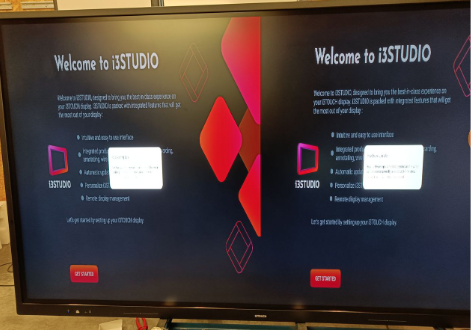
|
-
Copy the .IMG file to the root of your USB drive.
-
Insert the USB drive into the Android USB port at the bottom of the display.
-
Wait for the display to automatically reboot and apply the model type.
-
Required: manually reboot the display a second time to complete the process.
Troubleshooting
-
If you see no image during the update, wait up to 10 minutes. The status LED should blink slowly until the process is done.
-
Do not interrupt the update—wait for the display to reboot twice and show the setup wizard.
-
If the display does not start or shows errors after 10 minutes, remove the USB drive and try the process again.
-
If you see a doubled image after update, use the X2-98 model type file as described above.
-
For persistent issues, contact i3CONNECT support.