
This guide walks you through updating the firmware using just a USB drive and the display’s power button. This process is ideal for IT admins, installers, or anyone supporting i3SIXTY 3 displays when the remote is missing or unavailable.
By the end of these steps, your i3SIXTY 3 will be running the latest system firmware. If the update process doesn’t start or you see error messages, check the troubleshooting section below.
Before you start
-
Use a USB 2.0 flash drive (SanDisk recommended), formatted to FAT32.
-
Download the correct firmware version for your display size (see the Files section).
-
Make sure the USB drive contains only the firmware file—no other files or folders.
Do not interrupt the firmware upgrade process
-
Do not touch the display (to avoid touch recalibration).
-
Do not disconnect power.
-
Do not remove the USB drive.
Files
Choose the correct firmware for your display size. You can check the size by reading the serial number (e.g., i3TX375XXXXXXX = 75 inch).
Instructions
Prepare your USB drive
-
Format your USB drive to FAT32 using your computer.
-
Download the correct firmware file for your display size (see the Files section below).
-
Copy the firmware file to the root directory of the USB drive. Remove any other files or folders.
Start the firmware update
-
Power off the i3SIXTY 3 display completely.
-
Insert the prepared USB drive into a USB port on the display.
-
Press and hold the power button on the display.
-
While holding the power button, flip the power switch ON (located at the back of the display).
-
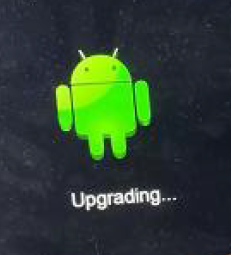
Keep holding the power button until you see an image appear on the screen, then release the button.
-
Wait for the update interface to appear. No further action is needed—the update will start automatically.
-
The display will restart several times as it updates. The process takes about 5 minutes.
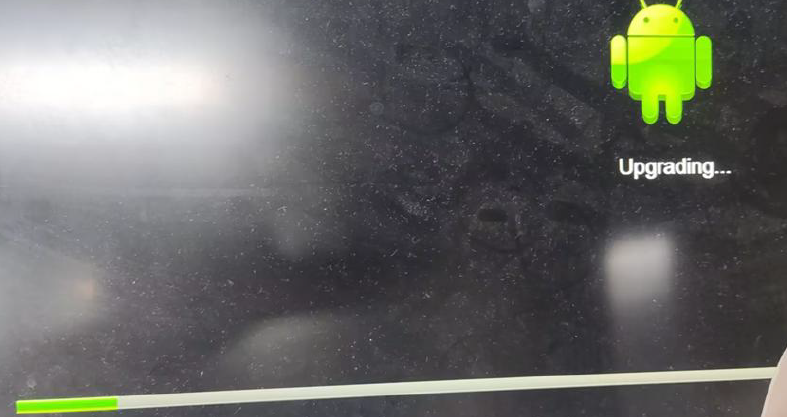
The display will first update its main firmware, then automatically update the MCU. When finished, the display will reboot and be ready to use.
Troubleshooting
-
Update doesn’t start: Check that your USB drive is formatted to FAT32 and contains only the correct firmware file.
-
Display not recognizing USB: Try a different USB 2.0 drive (SanDisk recommended).
-
Error messages or failed update: Remove the USB, power cycle the display, and repeat the process. If issues persist, contact i3CONNECT support.
-
Remote available? Use the standard update method for a simpler process.