Need to check if your i3SIXTY 3’s touch is working as it should? This guide walks you through running a touch test using the official tool. Use this article if you’re troubleshooting touch issues or verifying hardware after installation or repair. If your display is not powering on or you have physical screen damage, this guide won’t help—contact support instead.
Before you start
-
You’ll need a Windows PC with USB-C or HDMI + USB touch cable.
-
Download the official touch test tool: KT6740_Tool_V1.4.47_i3SIXTY-350_KasaR54.5_i3 50 sixty_Update 202407.zip.
-
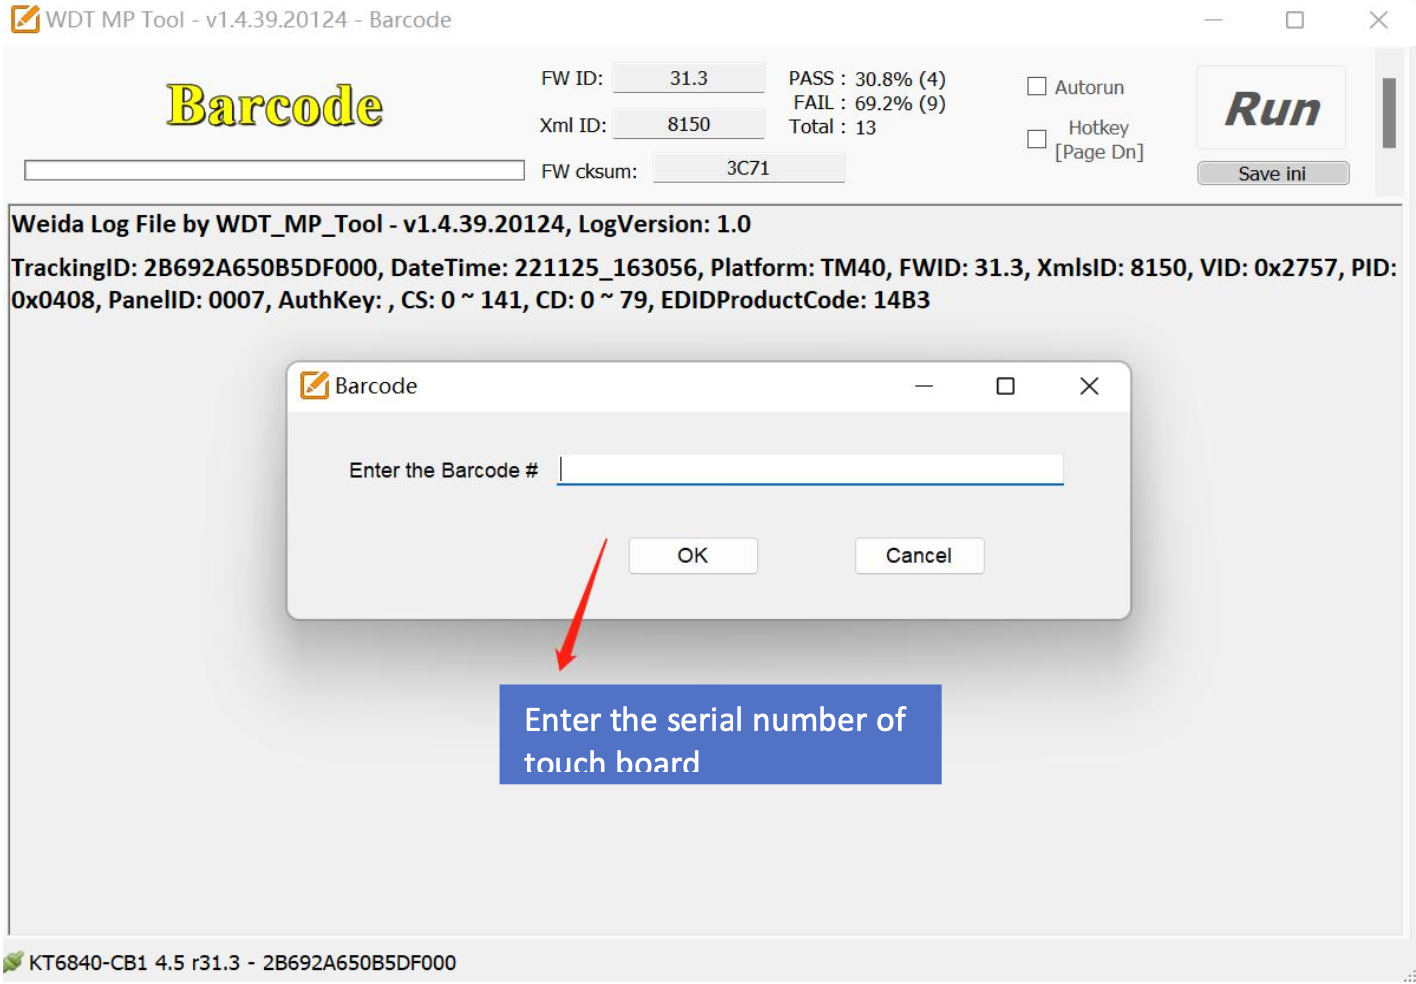
Make sure you have the serial number of your i3SIXTY 3 handy.
Warning: Do not touch the i3SIXTY 3 screen during the test, or results may be inaccurate.
Instructions
-
Connect your PC to the i3SIXTY 3 using a USB-C cable, or HDMI plus USB touch cable.
-
Download and unzip the file:
KT6740_Tool_V1.4.47_i3SIXTY-350_KasaR54.5_i3 50 sixty_Update 202407.zip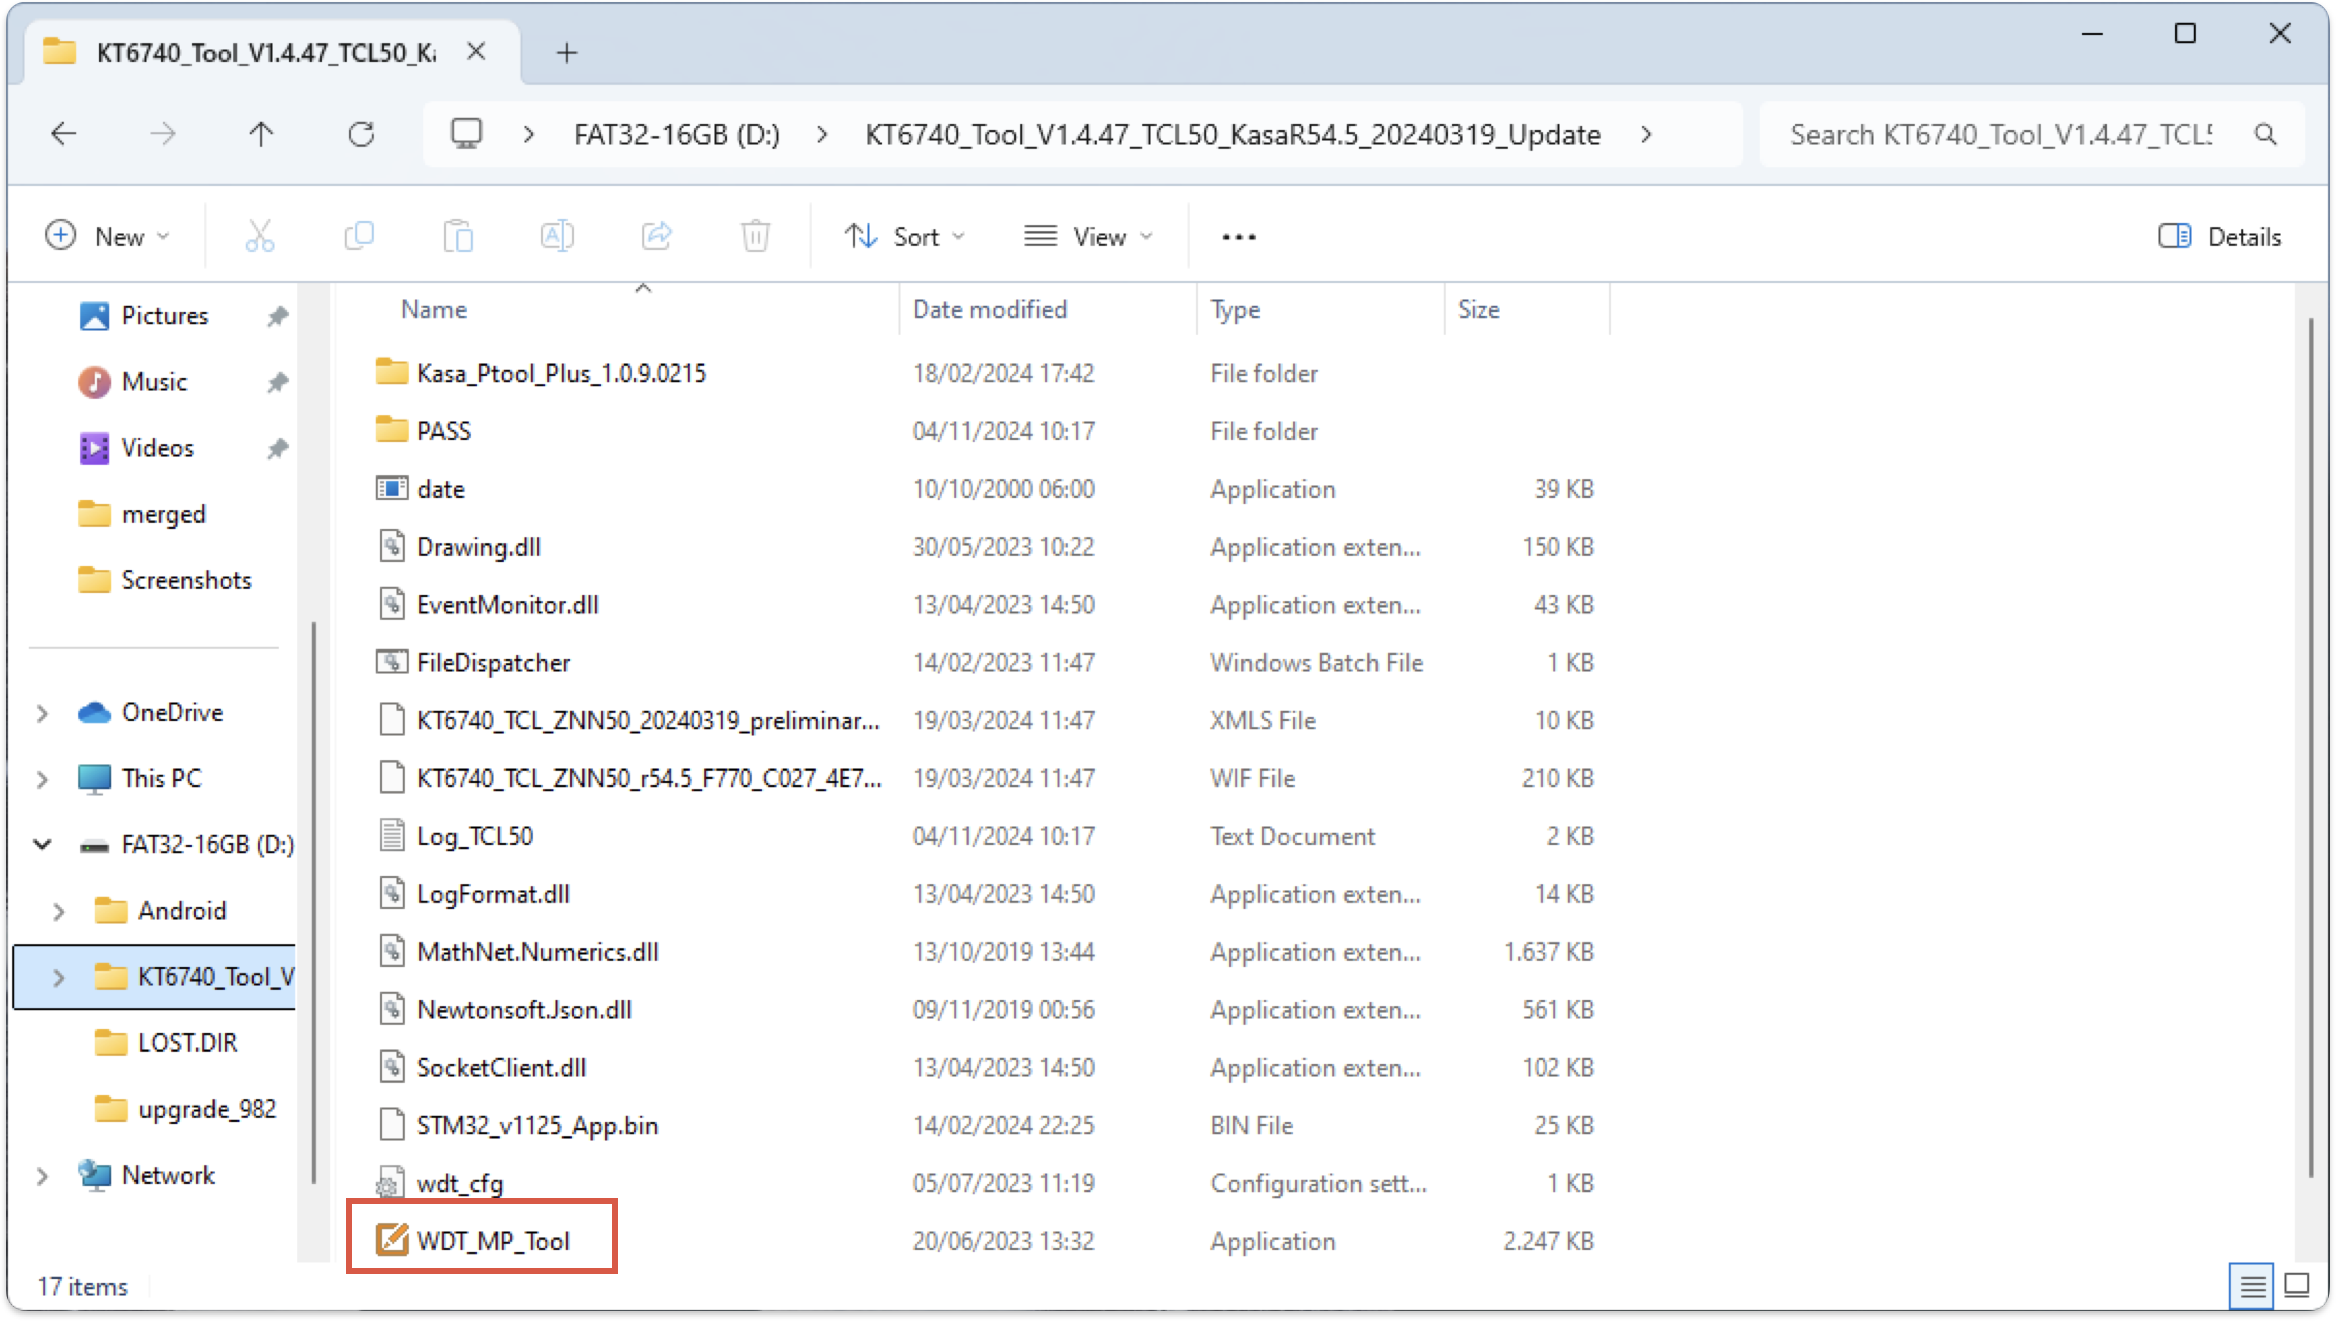
-
Open the folder and launch WDT_MP_Tool.exe.
-
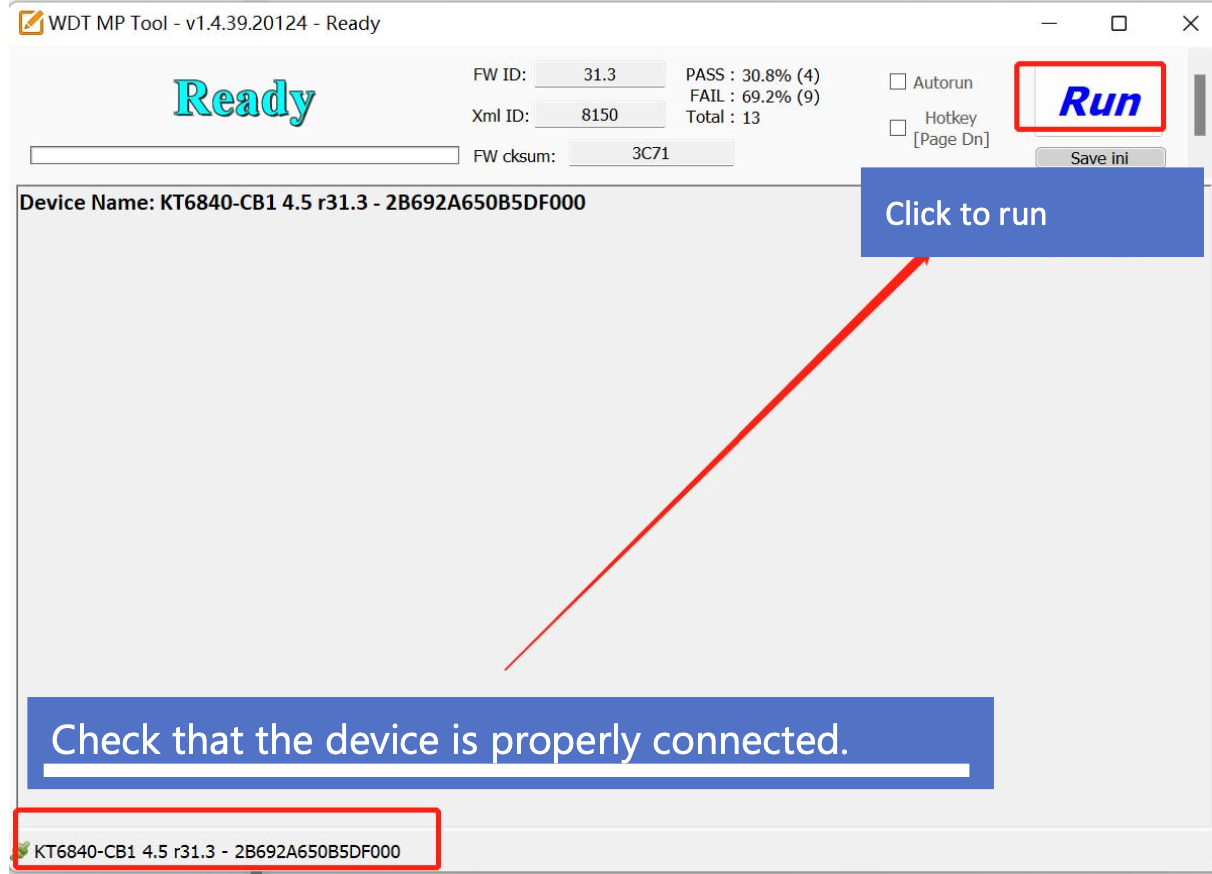
Confirm your i3SIXTY 3 is detected by the tool.
-
Click “Run” to start the touch test.
-
When prompted, enter the serial number of your i3SIXTY 3.
-
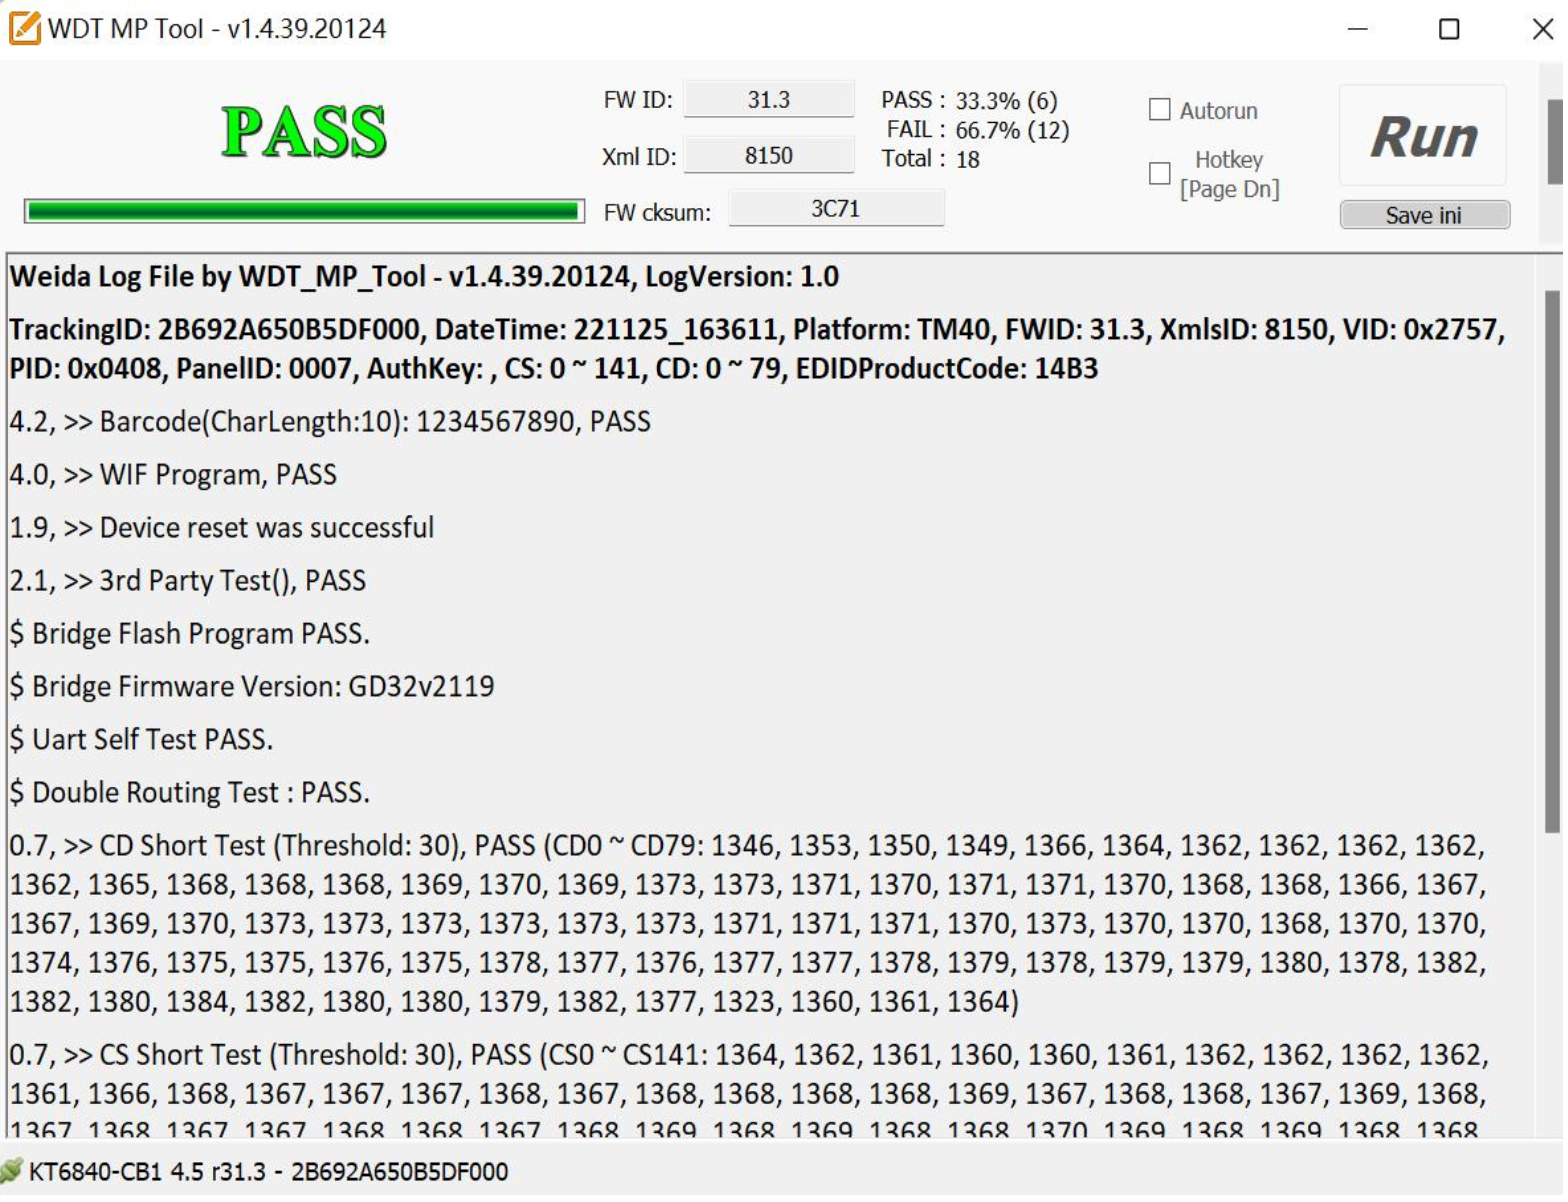
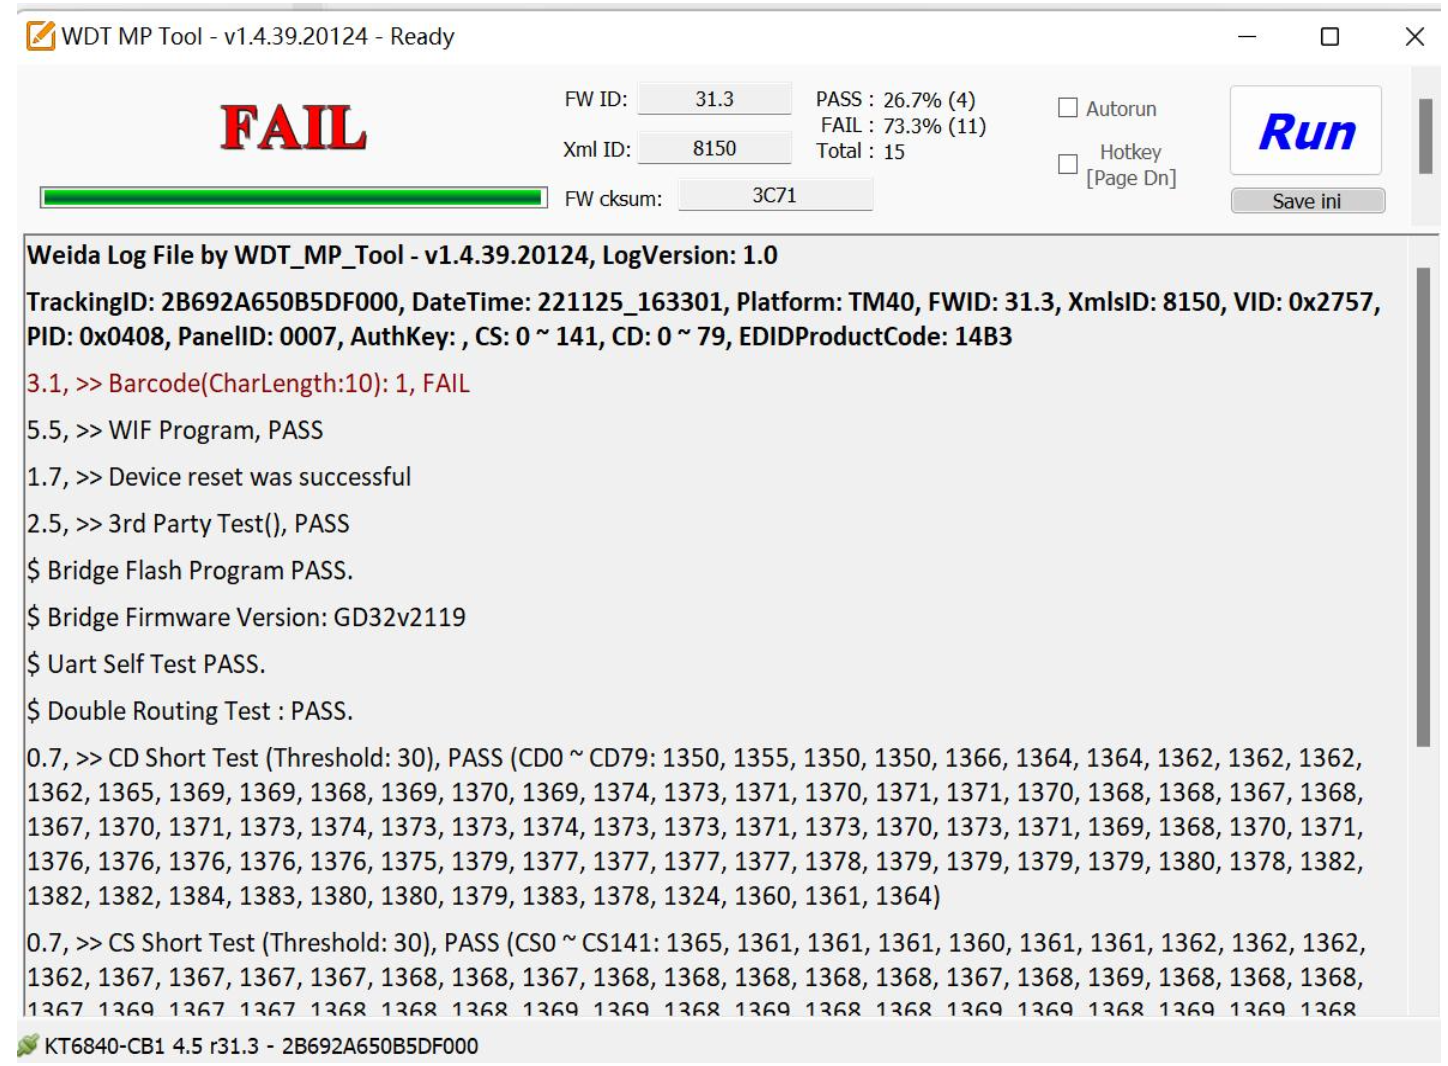
Wait for the test to complete. The tool will display “pass” if the touch is working, or “fail” if there’s an issue.
-
Take a screenshot of the result and save the log files.
-
Share the screenshot and logs shown below with i3CONNECT support if requested.