
Need to update your i3SIXTY 3 camera firmware? This guide walks you through a manual upgrade using a Windows 10 or 11 computer. Use this article if your camera isn’t updating automatically or you’ve been instructed to perform a manual update. If your camera is already on the latest firmware or you’re using a Mac, these steps won’t apply—contact support for further help.
Before you start
-
You’ll need a Windows 10 or 11 computer.
-
Download the update.zip file and extract it to your computer.
-
Have a USB-C male to USB-C female extension cable ready. The i3SIXTY 3 camera’s USB-C connector won’t fit directly into most laptop ports due to its fixation points.
File download
|
Description |
Document |
|---|---|
|
Update file |
Instructions
-
Download and extract the update.zip file to your Windows computer.
-
Connect the i3SIXTY 3 camera to your computer using the USB-C extension cable.
Do not attempt to force the camera’s USB-C connector into a standard port—use the extension cable to avoid damage.
-
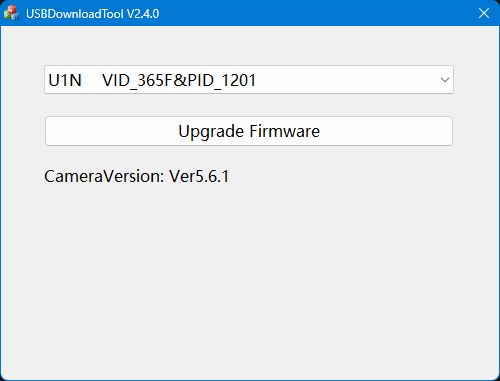
Open the “USBDownloadTool V2.4.exe” file from the extracted folder.
-
In the tool window, confirm your camera is detected (the version number should appear and be lower than the update).
-
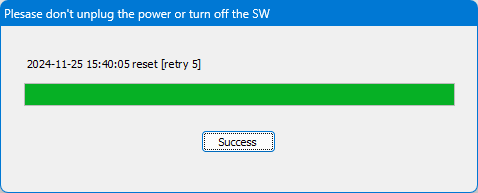
Click “Upgrade Firmware” to begin. The process takes about 1 minute.
During the upgrade, do not disconnect the camera or close the tool.
-
Wait for the “Success” message to appear.
-
Click “Success” to finish and close the tool.
-
Disconnect the camera and close any remaining windows.
Troubleshooting
-
If the camera isn’t detected, double-check your cable and connection.
-
If the upgrade fails or the camera doesn’t work after updating, restart your computer and try again.
-
Still stuck? Reach out to i3CONNECT support for help.