
The device name is what is shown to people when they are choosing which display they wish to share their screen to. The same name is used to cast using Miracast, Google Cast, AirPlay, or the AllSync app. This name is set during the initial setup of your i3CONNECT display with the Studio startup wizard.
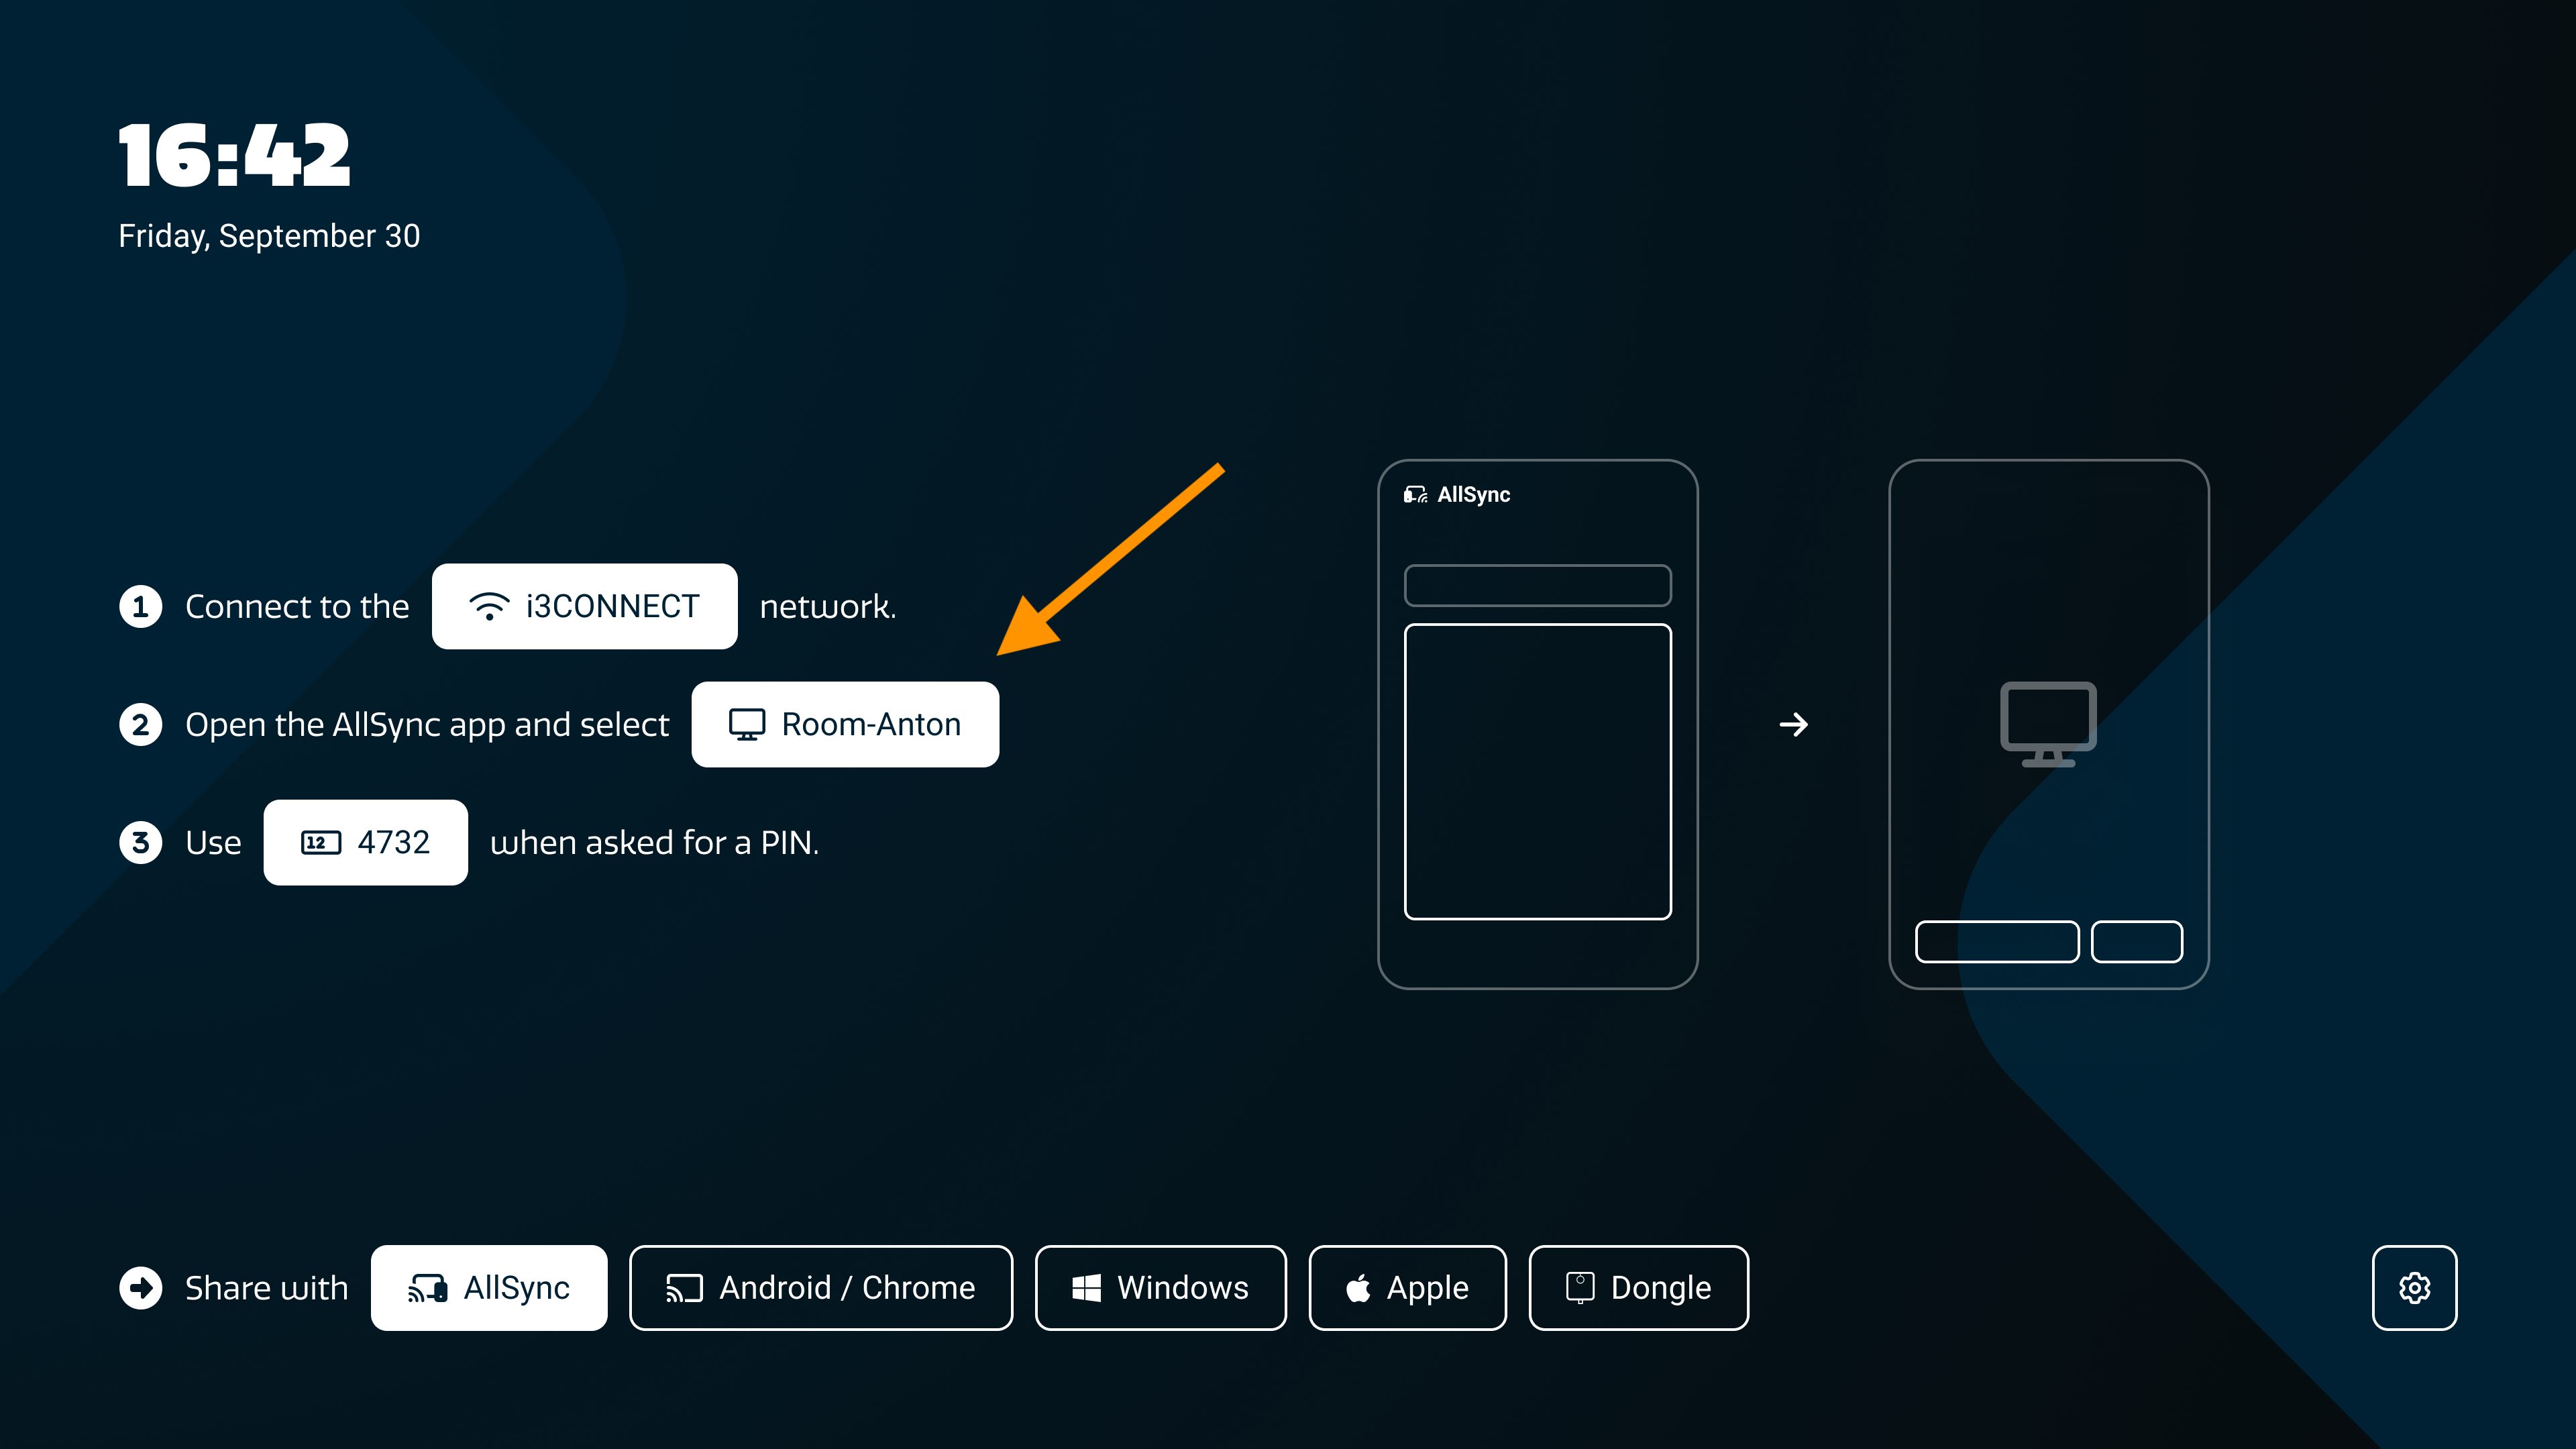
This article explains how to change that name directly on the display or remotely using Cortex. This is especially handy for keeping rooms organized or making it easier for guests to find the right display.
Before you start
-
Make sure you have admin access to the display or to Cortex.
-
The display should be powered on and connected to your network.
-
For Cortex, the display should have already been entered in your Cortex display list.
Instructions
Change the device name directly on the display
-
Open the Studio settings menu. Tap on the gripper

-
Go to Admin settings. In the full settings menu, select “Admin settings” from the left sidebar, then choose “Android.”
-
Access Android device info. Scroll to the bottom and select “About” from the left sidebar.
-
Edit the device name. Tap “Device name.” A pop-up will appear—use the on-screen keyboard to enter the new name.
Change the device name remotely using Cortex
-
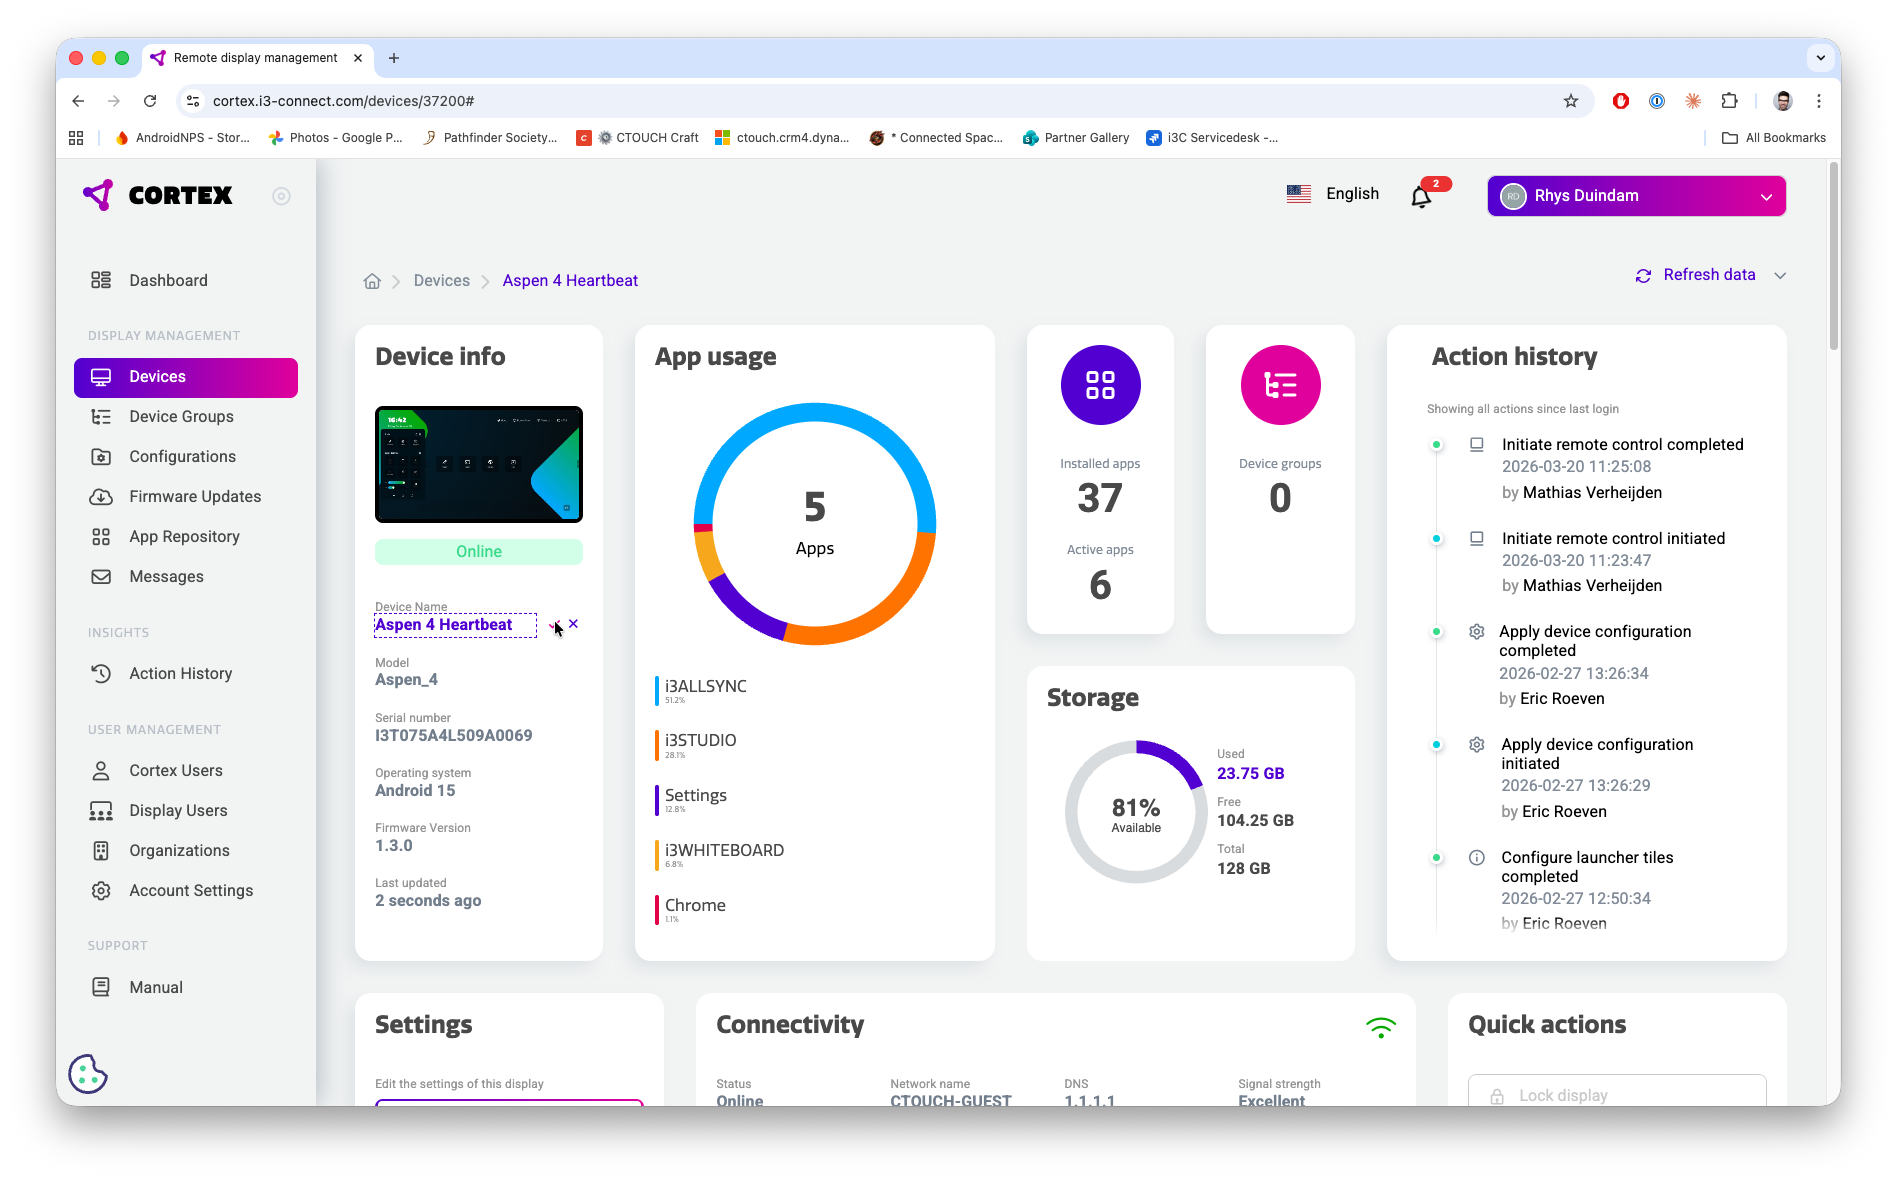
Log in to Cortex. Go to https://cortex.i3-connect.com/.
-
Select your device. Click “Devices” in the left sidebar, then choose your display from the list.
-
Edit the device name. In the “Device info” block, click the edit icon next to the current name. Enter the new name and click the checkmark to confirm.
-
Apply the change. The new name will be sent to the display immediately if it’s on, or the next time it powers up.
Troubleshooting
-
If the device name doesn’t update, restart the display and check your network connection.
-
If you can’t access admin settings, confirm you have the correct permissions.
-
For persistent issues, contact i3CONNECT support or see our wireless sharing troubleshooting articles.