
Only use for PN 10010581 - i3ALLSYNC TOUCH USB-C Transmitter 4.1 (5ghz)
Purpose
This document describes the FW update process for the i3ALLSYNC TX dongle.
Preparation
· What’s needed?
· Host computer with USB-C port running Windows OS; this computer will perform the update
· Latest FW package
WiFi Transmitter Firmware Update Tool v3.0.0.4 FW v1.0.038.zip
· I3ALLSYNC TX dongles that need to be updated
· Get the latest FW update ZIP package from i3-Technologies onto the host computer
· Connect the dongle to be updated using the USB-C connection to the host computer which will perform the update.
Update Procedure
1.
Unzip ”WiFi Transmitter Firmware Update Tool xxxxx” into a local directory
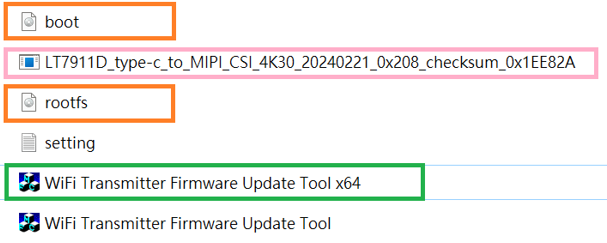
Note that the files (boot.img, rootfs.img, LT7911D_xxxxx.bin) need to be put in the same directory.
· LT7911D_xxxxx.bin : It will update the firmware of the front-end (TypeC Rx).
· boot.img, rootfs.img : It will update the firmware of the SoC (RV1126).
2.
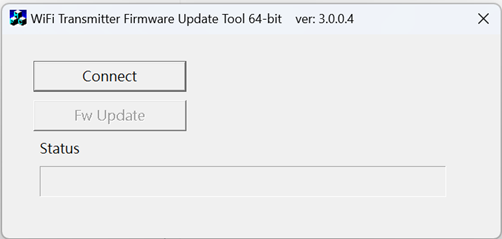
Run the “WiFi Transmitter Firmware Update Tool x64”. In case you are running older 32-bit versions of the Windows OS, please use the version without x64.
3.
Please click【Connect】button, it will auto-detect if the device can be connected or not.
4.
Please click【Connect】button, it will auto-detect if the device can be connected or not.
5.
The firmware update tool will try to enter “Boot Mode” for the firmware update process. It will generate a storage class as below.
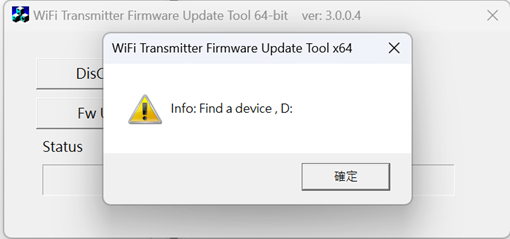
P.S. You will find the LED shows the purple flicker.
6.
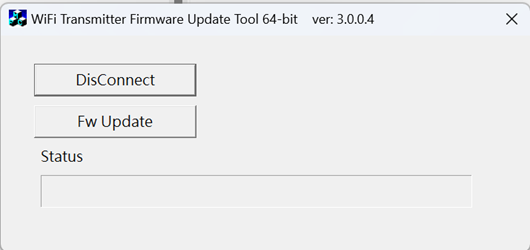
If the device is switched to “firmware update mode” successfully, the 【Fw Update】button will be enable and you can click【Fw Update】to process the firmware update.
7.
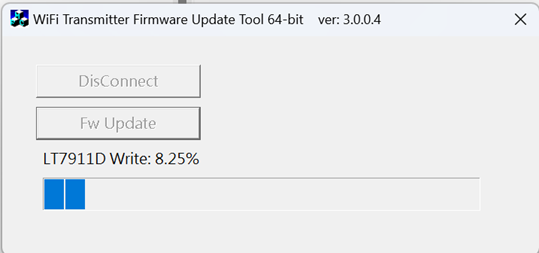
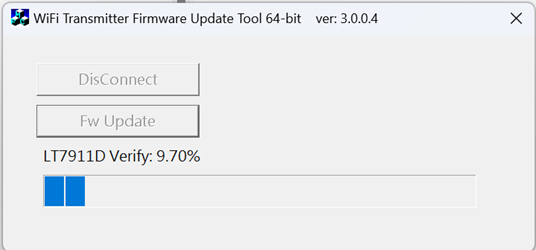
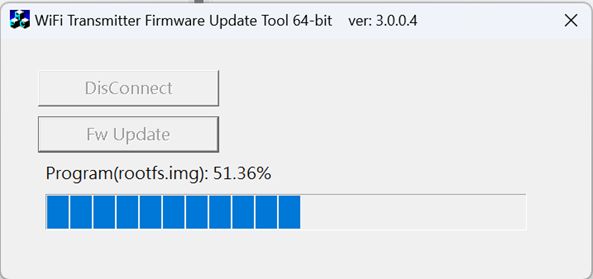
Click【Fw Update】, it will auto-update the firmware as follows:
· Update LT7911D_xxxxx.bin file, as below.
· Update boot.img

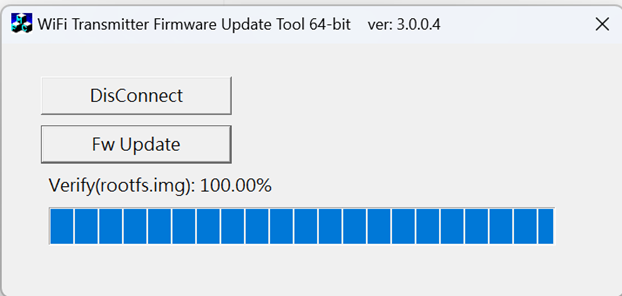
· Update rootfs.img ( The LED still shows the purple flicker. )
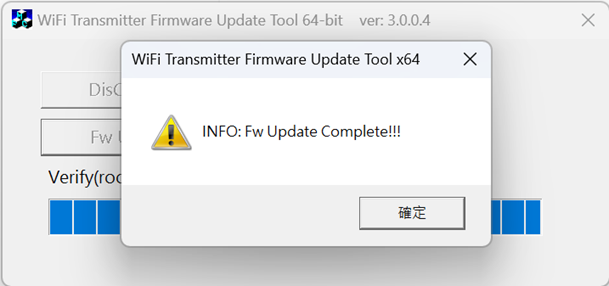
8.
Once the update is finished, it will show the following message. When click “OK”, it will close the update process. (It will show a WHITE LED once)
9.
Click “X” in the right-top of the windows to exit.
10.
The update is complete and you can remove the i3ALLSYNC TX dongle from the host computer.
If there are more dongles to be updated, please attach the next dongle and repeat from relaunching the update tool.
Notice
The pictures in this document are only indicative, actual product and software may have slight difference in product effects (included but not limited to appearance, color and size).
Efforts have been made to check that information provided here to be correct and complete at the time of publication. Subject to change without prior notice.