
Upgrade your i3SIXTY 2 camera system firmware to ensure the best video quality and compatibility for hybrid meetings and classroom collaboration. This guide is for IT admins or advanced users updating the camera firmware using a Windows PC. If your camera already appears as “4K Camera” in Windows Device Manager, you do not need this upgrade.
Before you start
-
You’ll need a Windows PC with USB-C or HDMI+USB connectivity.
-
Download the USBDownloadTool.exe and have it ready.
-
Ensure the i3SIXTY Camera is connected to the i3SIXTY 2 display.
File downloads
|
Description |
File |
|---|---|
|
USBDownloadTool.exe |
Instruction video
Instructions
-
Connect the i3SIXTY Camera to the i3SIXTY 2 display (use either camera slot).
-
Connect your Windows PC to the i3SIXTY 2 via USB-C, or HDMI plus USB.
-
Open Windows Device Manager to monitor the camera status. (When the upgrade is complete, the camera will appear as “4K Camera”.)
-
Launch USBDownloadTool.exe on your PC.
-
Click “Upgrade Firmware”.
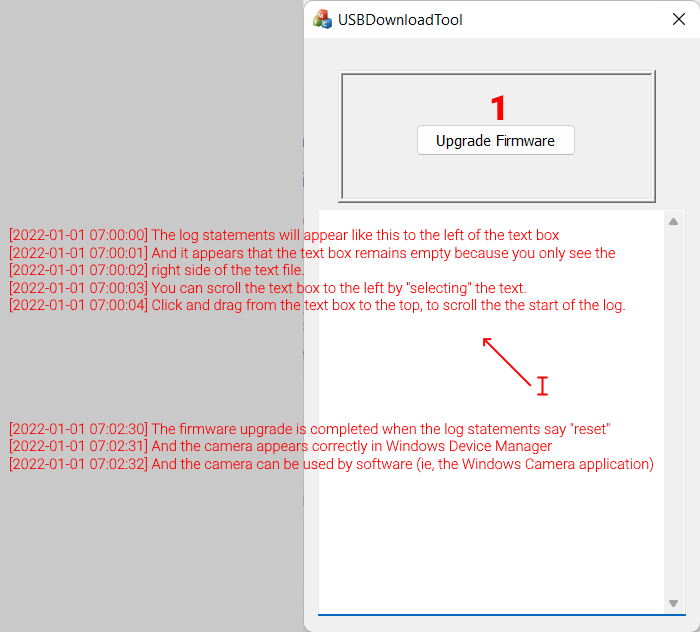
The USBDownloadTool interface may not display log text correctly on Windows 11. To view progress, select and scroll left in the log text box.
Troubleshooting
-
If the camera does not appear as “4K Camera” after upgrading, restart both the display and your PC, then repeat the process.
-
If the USBDownloadTool fails or freezes, try a different USB port or cable.
-
For persistent issues, contact i3CONNECT support.