
If your camera image appears rotated by 90°, your i3SIXTY 2’s USB-C camera ports may need recalibration. This guide walks you through calibrating both landscape and portrait USB-C camera ports to ensure your camera feed displays correctly. This process is intended for installers, IT admins, or advanced users. If your camera image is not rotated, you do not need to follow these steps.
By the end of this guide, your camera image should display in the correct orientation in both landscape and portrait modes. If calibration fails or the image remains rotated, contact i3CONNECT support.
Before you start
-
You’ll need a USB-C flash drive or a USB-A to USB-C adapter.
-
Access to the i3SIXTY 2 display in both landscape and portrait positions.
Instructions
-
Create the calibration file.
-
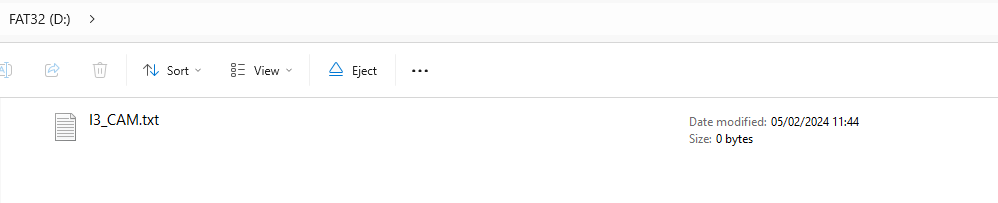
Open Notepad and create an empty file named “I3_CAM.txt”.
-
Save this file to the root folder of your USB flash drive.
-
-
Calibrate the landscape (long side) USB-C port.
-
Rotate the i3SIXTY 2 into landscape (horizontal) mode.
-
Insert the USB stick into the top USB-C port.
-
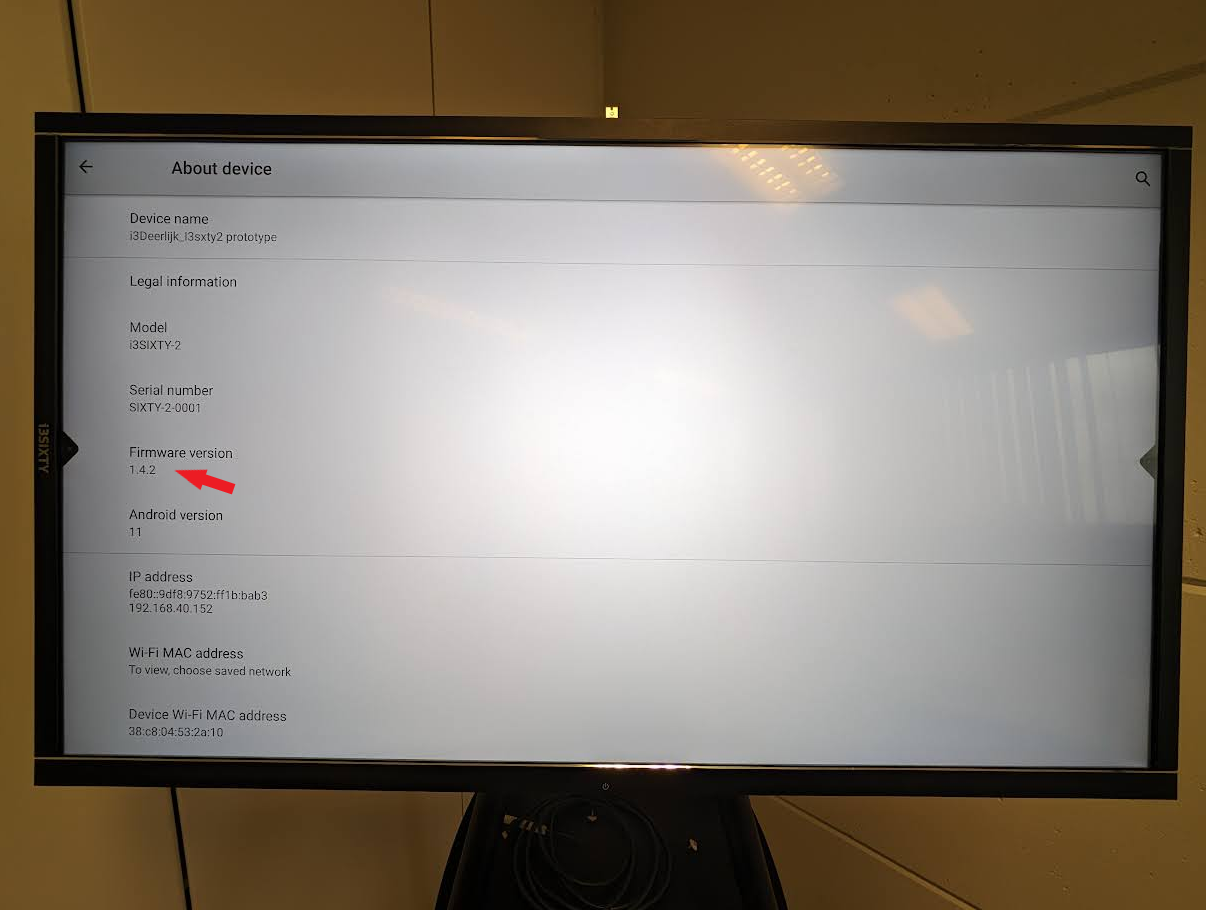
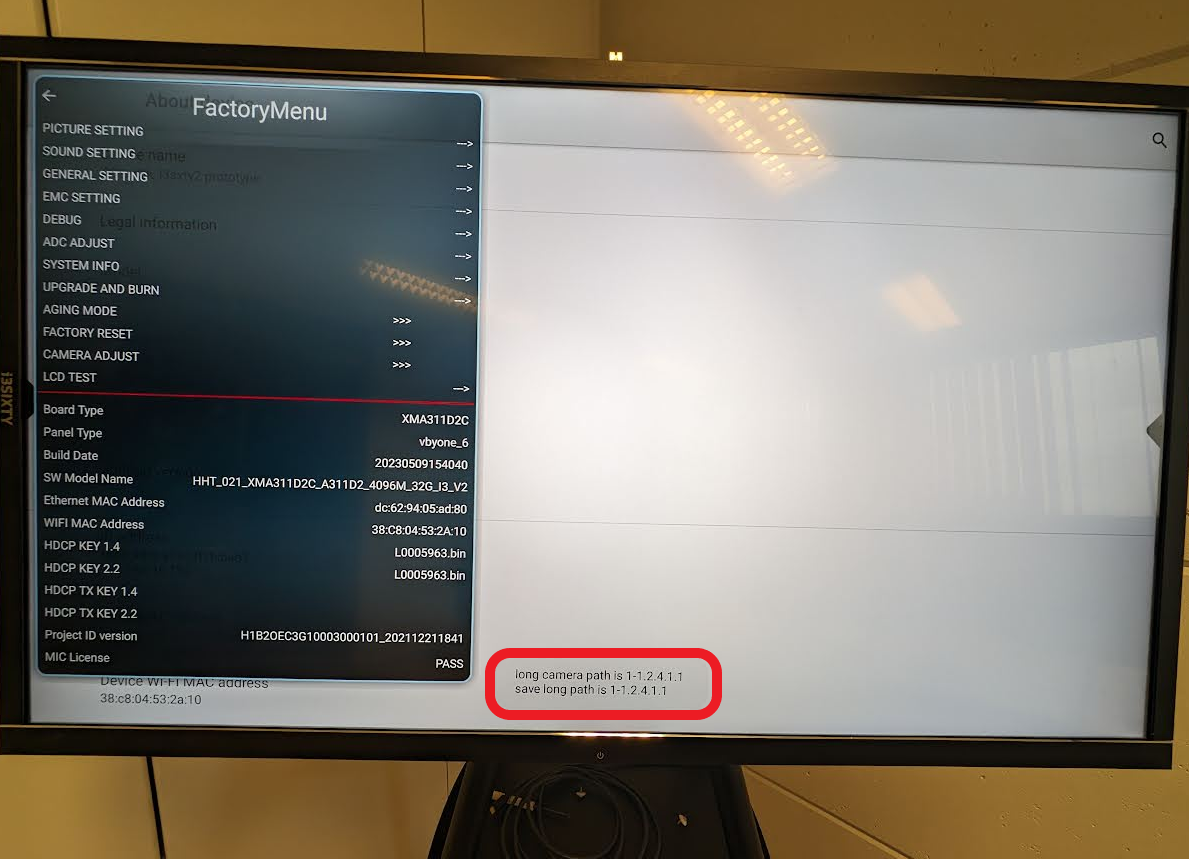
Open the Factory menu: Go to Android settings > About device, then tap the firmware version 10 times.
-
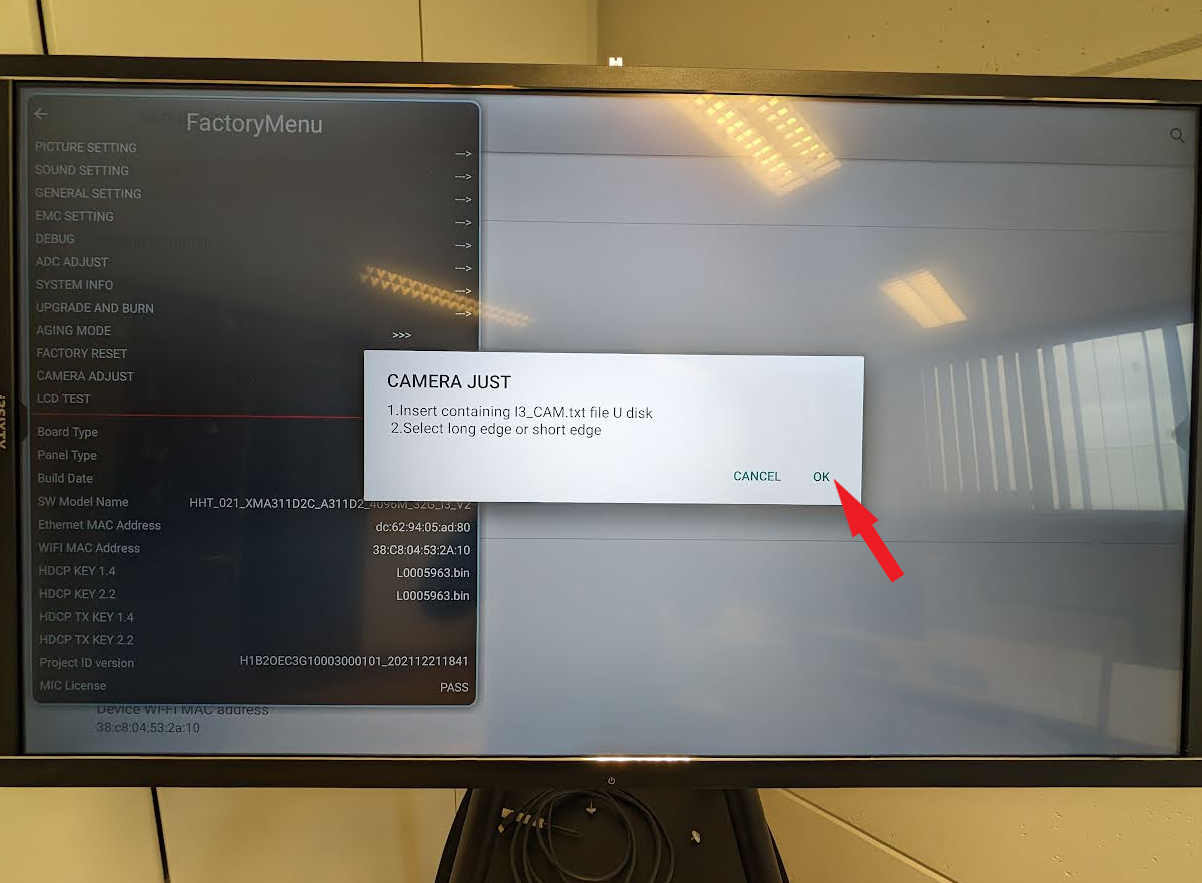
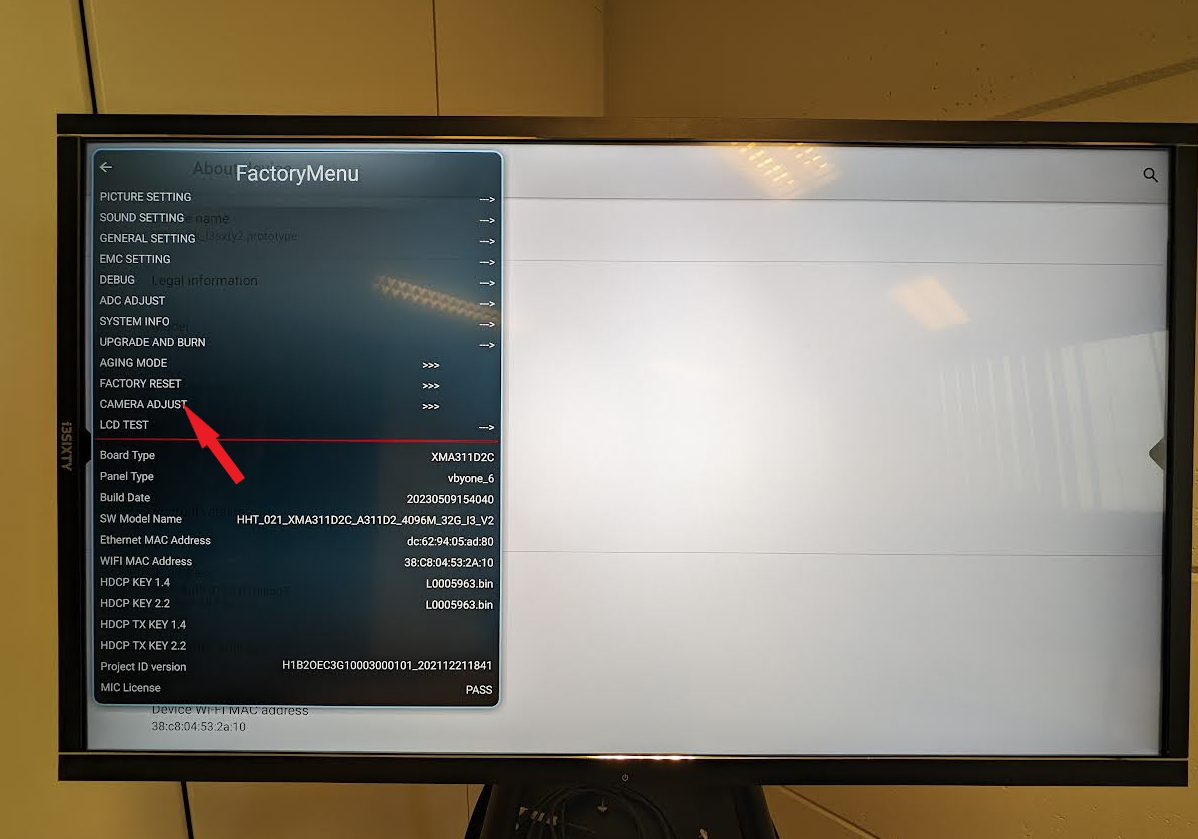
Select “Camera adjust”.

-
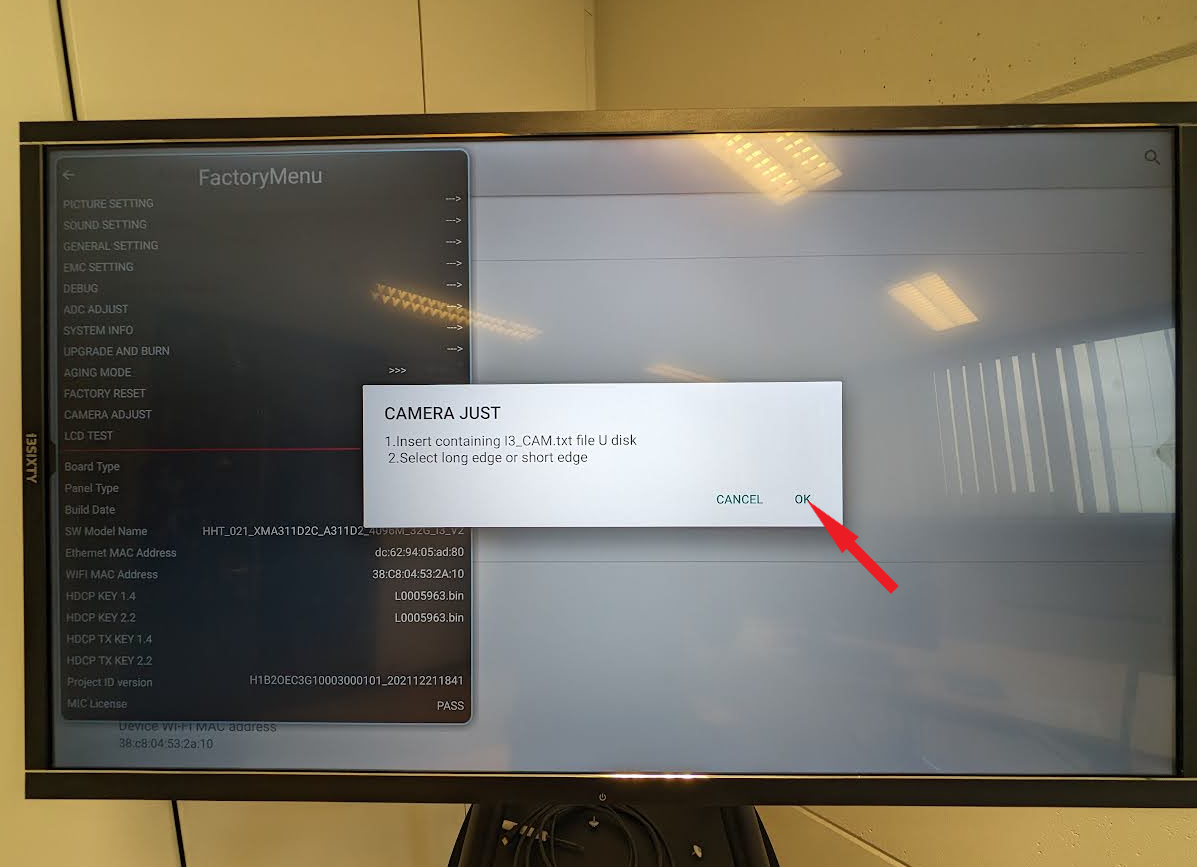
Tap “OK” on the pop-up menu.
-
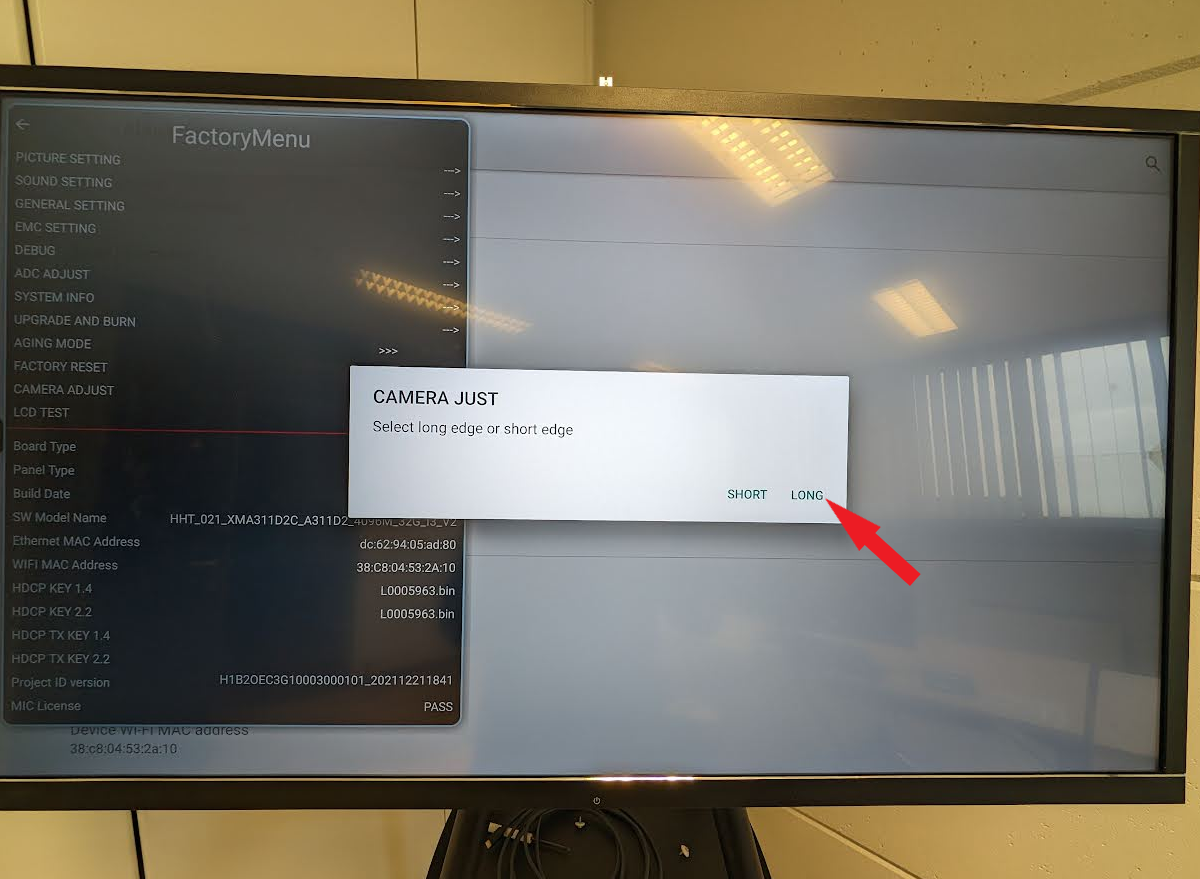
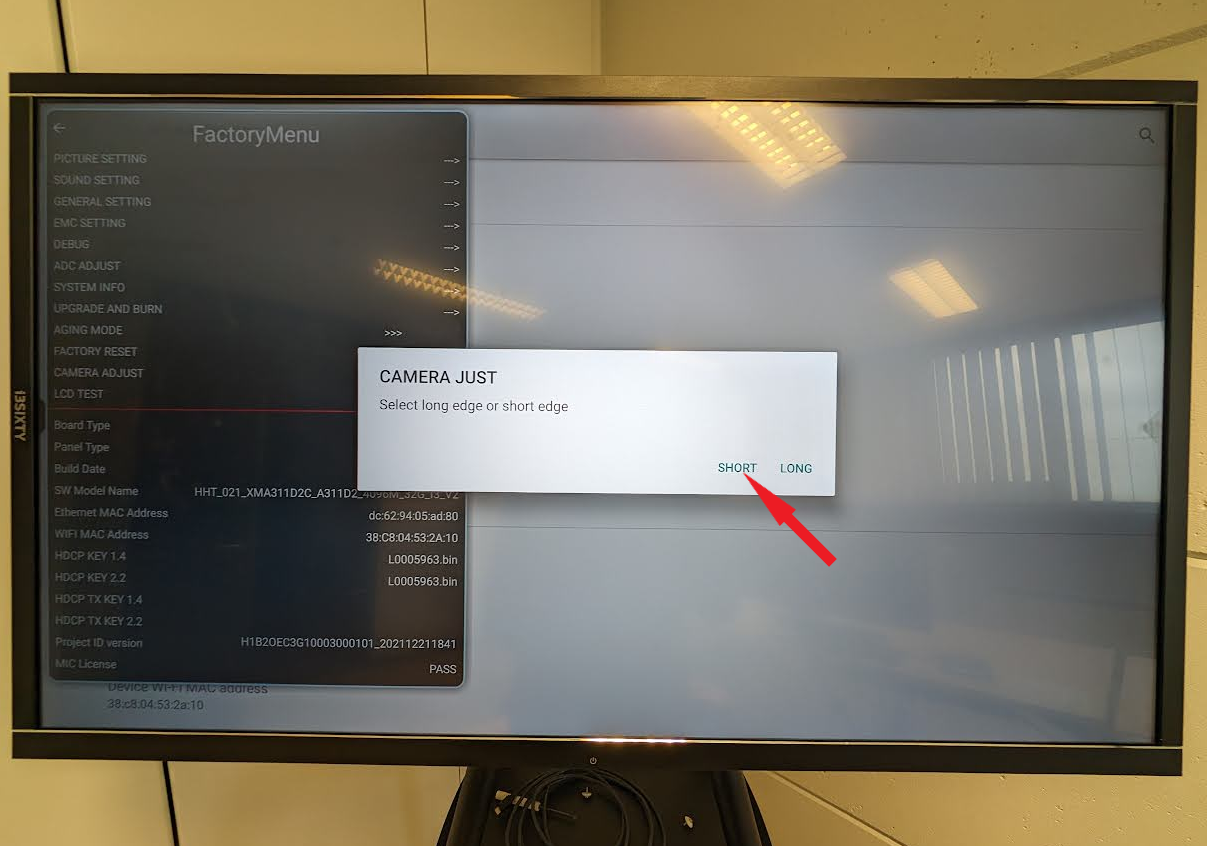
Select “Long”.
-
Check the message at the bottom of the screen. If “long camera path” matches “save long path”, your landscape USB-C port is calibrated.
-
-
Calibrate the portrait (short side) USB-C port.
-
Insert the USB stick into the portrait USB-C port (short side).
-
Select “Camera adjust” in the Factory menu.
-
Tap “OK” on the pop-up menu.
-
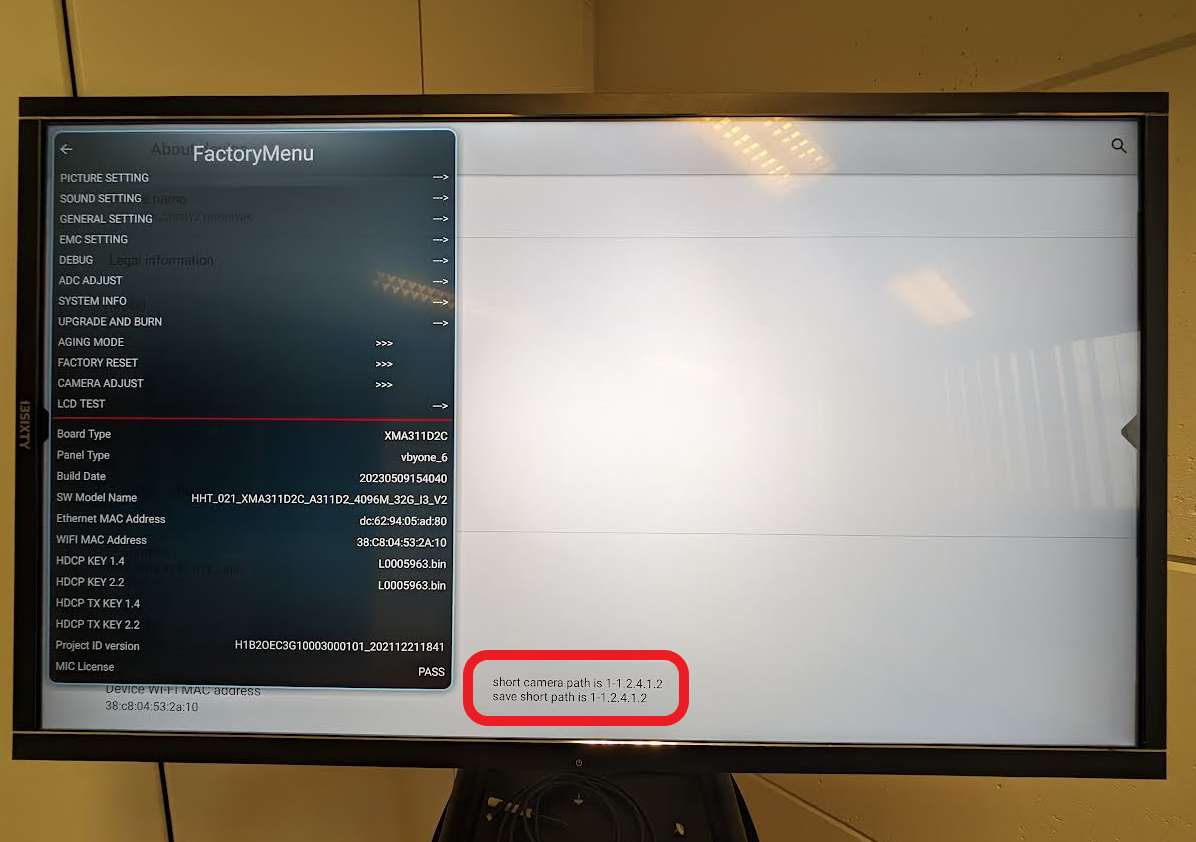
Select “Short”.
-
Check the message at the bottom of the screen. If “short camera path” matches “save short path”, your portrait USB-C port is calibrated.
-
Troubleshooting
-
If the calibration message does not confirm a match, repeat the steps or try a different USB stick.
-
If your camera image is still rotated after calibration, contact i3CONNECT support for further assistance.
-
This process is not needed if your camera image is already correctly oriented.