
Read this when replacing a never used mainboard.
i3CONNECT ELM 2 replace defective mainboard to a never used mainboard from the factory
Required tools
-
1x USB 2.0 Flash Drive / Stick (We recommend a SanDisk brand, Formatted to FAT32).
-
The correct update file below
Firmware files
Download the link for the correct size of your display. You can find out which display size you have by reading the serial number. For example I3T075E2XXXXXXXXX is the 75 inch size.
|
Display |
Firmware v1.1.1 |
Firmware v1.1.2 |
Firmware v1.2.0 |
Firmware v1.3.0
|
|---|---|---|---|---|
|
Elm2 - 65” |
||||
|
Elm2 - 75” |
||||
|
Elm2 - 86” |
Instructions
-
Make sure the i3CONNECT Display is switched off.
-
Format the USB [minimum 4GB] stick as FAT32.
-
Extract upgrade file you downloaded above to the USB disk (FAT32) and place it in the root directory (the main folder). You will see an "upgrade_3576" folder there.
-
Safely detach the USB disk from your computer.
-
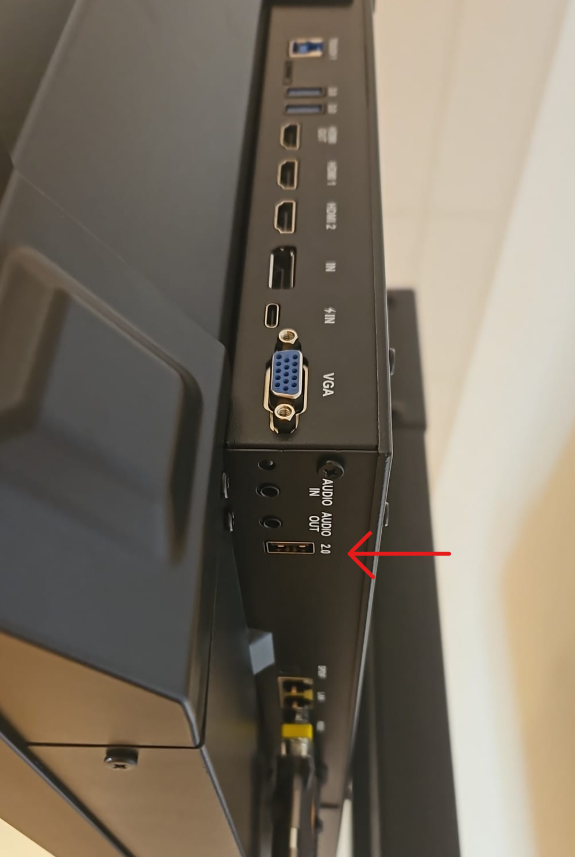
Insert the USB disk into the USB 2.0 port on the right bottom side of the i3CONNECT display (see marked picture).
-
Power on the panel with the USB still connected by pressing the POWER button and holding it pressed until the power LED blinks red and white. It will now update
What happens during the update
The display will compare the version you are trying to install with the already-installed version. When they are the same, it wont install any firmware update. In some cases, it might be necessary to install another version of the firmware first to achieve your desired installed version.
First, the display will update and when it is finished, the screen will reboot and upgrade MCU automatically. The whole update will take about 15 minutes to complete.
Do not interrupt the firmware upgrade process in any way:
-
Do not touch the i3CONNECT display (due to potential touch recalibration)
-
Do not disconnect the i3CONNECT display from power.
-
Do not remove / pull out the USB drive